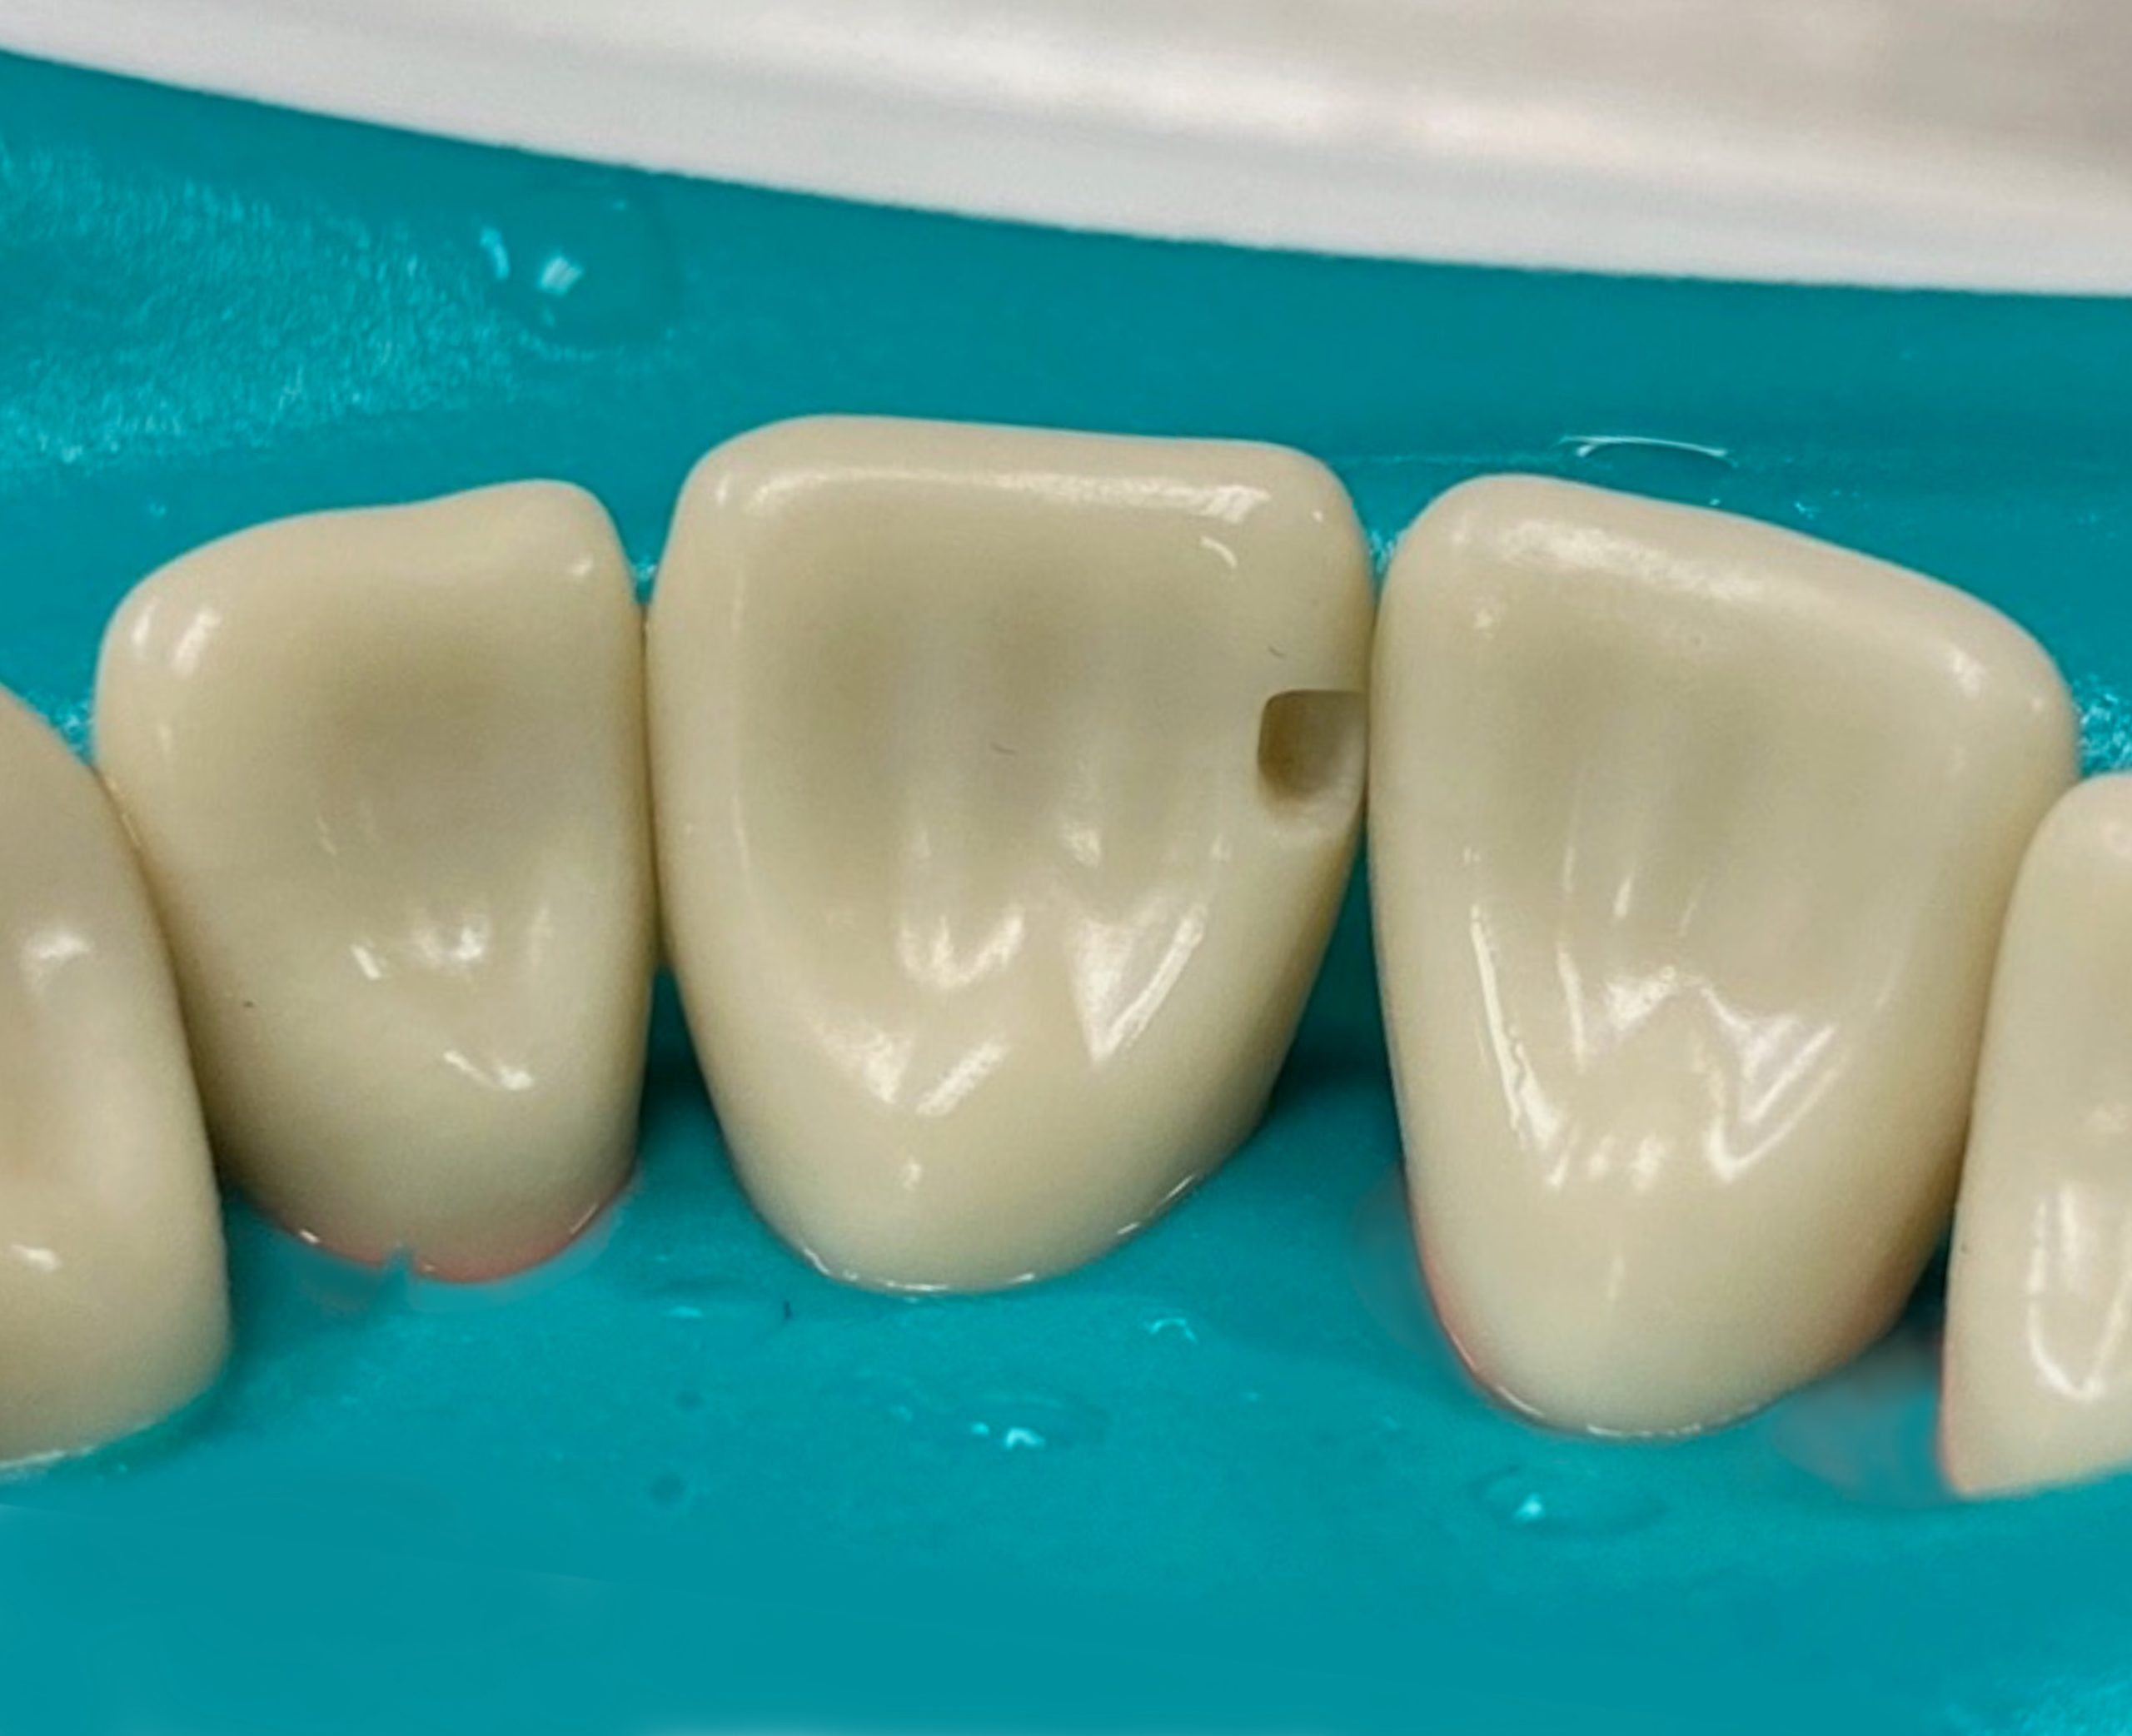
Class III Composite Preparation
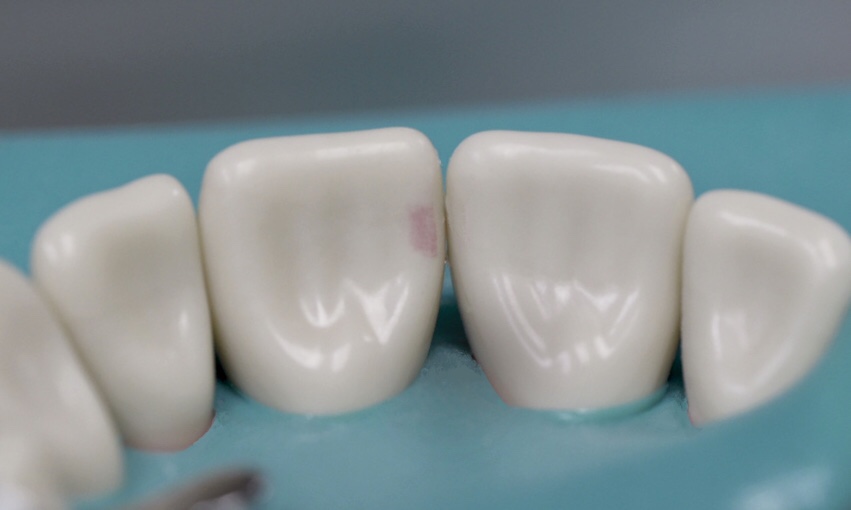
#8 ML
Overview
-
Outline Form
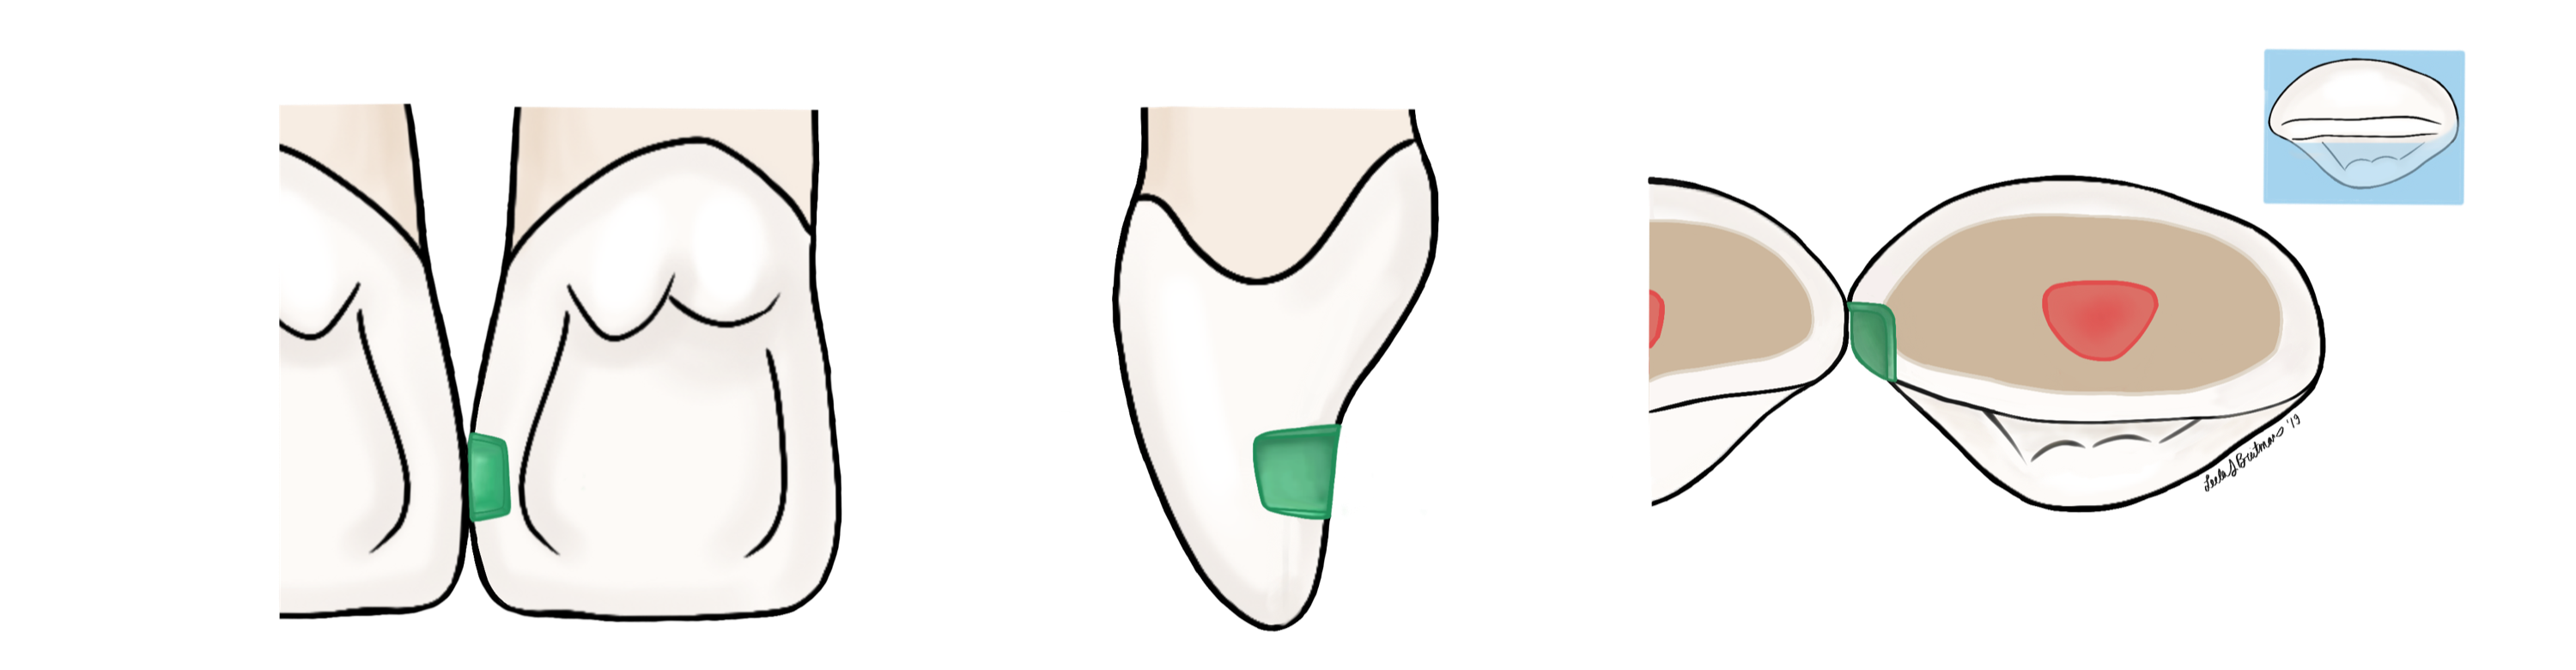
preparation outline is determined by the extent of the carious lesion, defects, or old restorative material
-
Retention Form

obtained through micromechanical bonding of tooth structure to restoration material
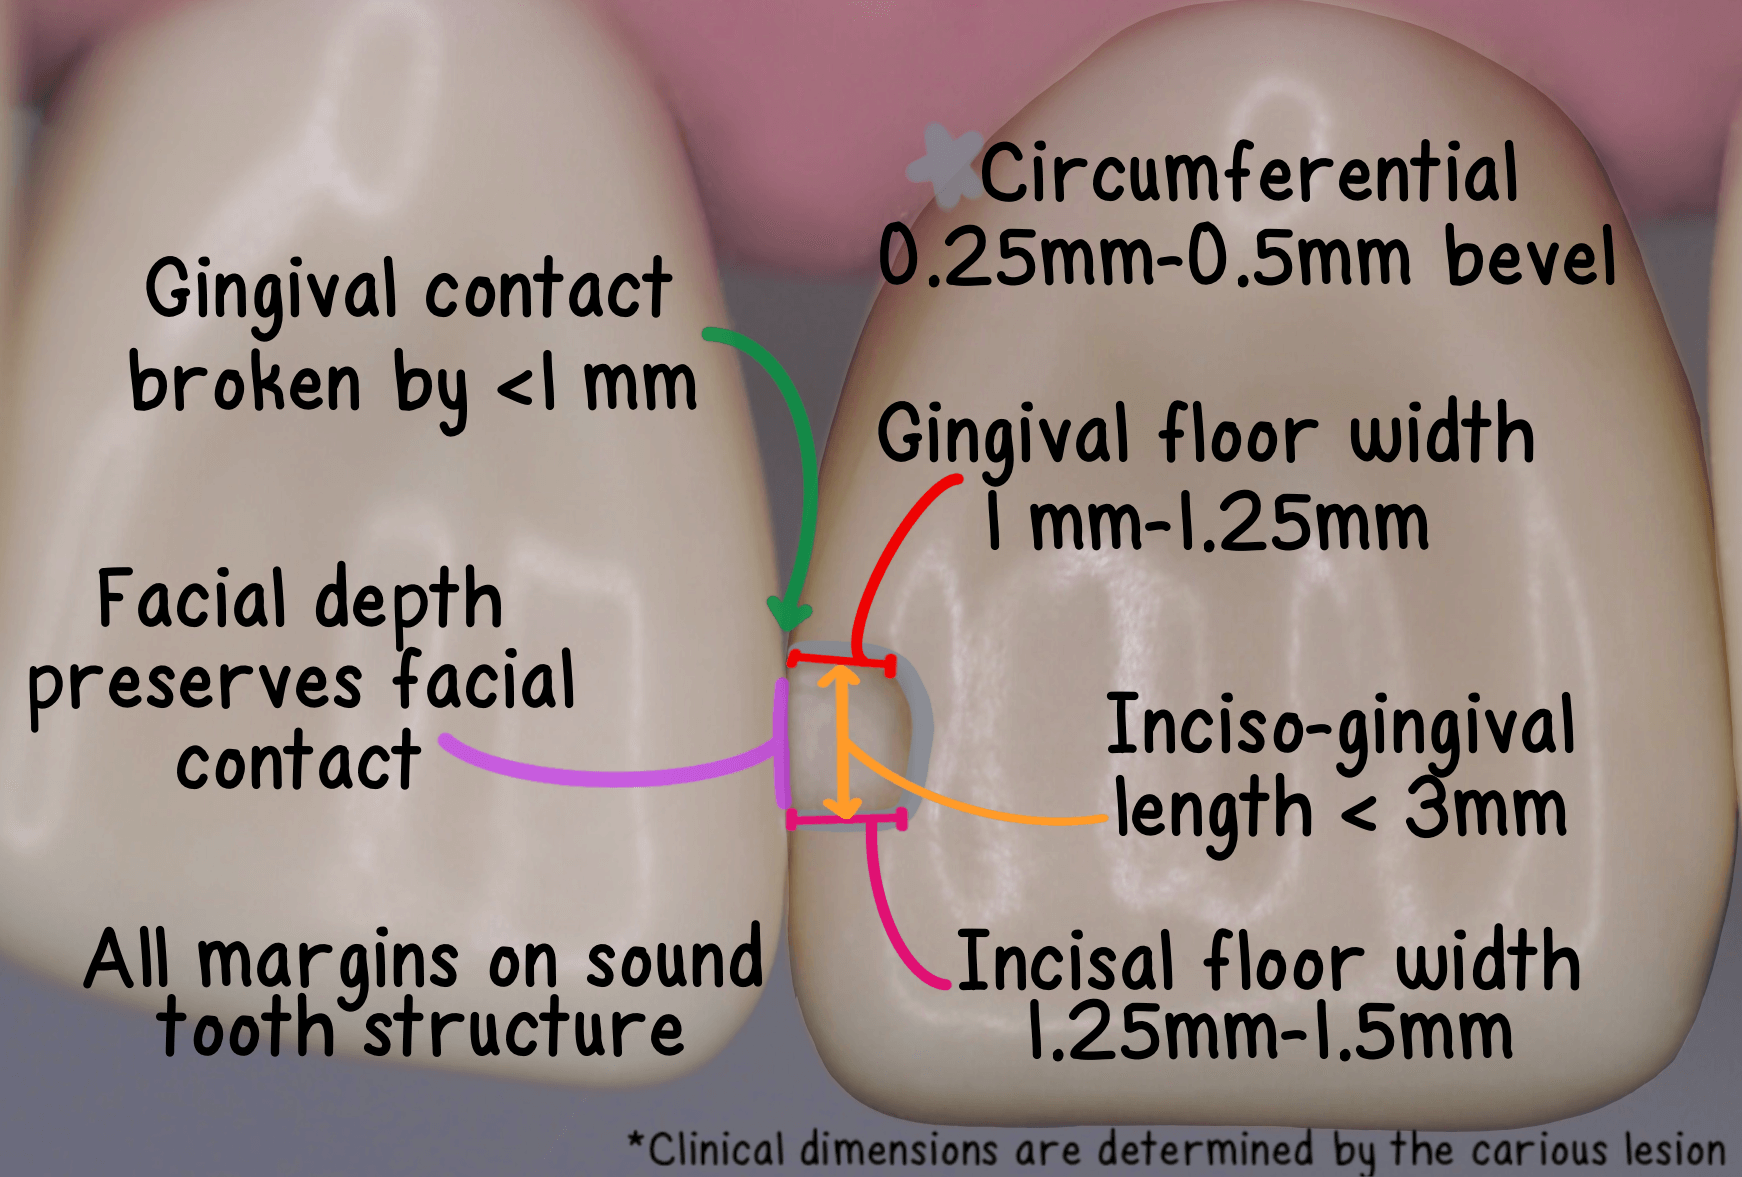
*beveling increases tooth structure available for bonding -
Resistance Form
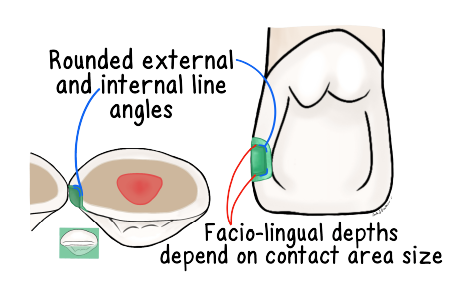
rounded box form provides greater resistance to fracture of the restoration and tooth from masticatory forces
-
Convenience Form

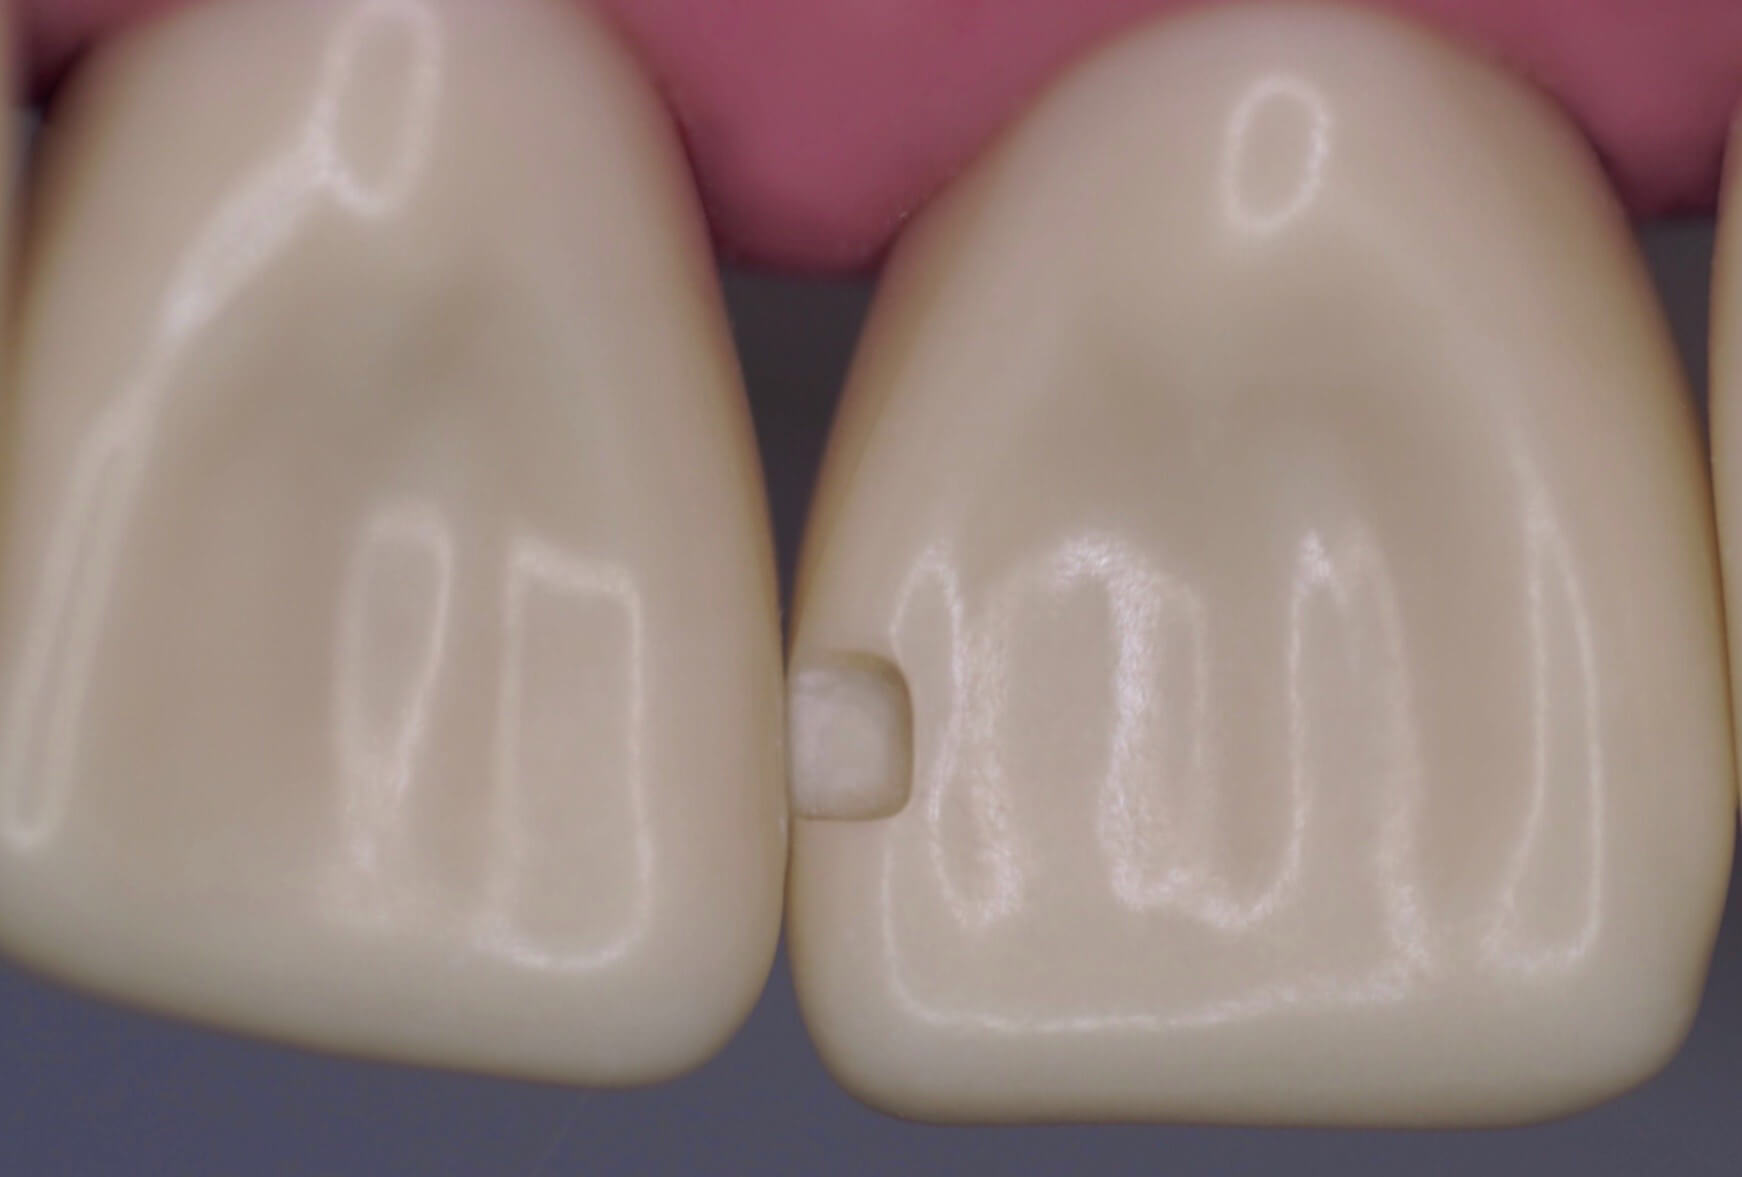
appropriate access to the interproximal lesion is gained from the lingual or buccal surface
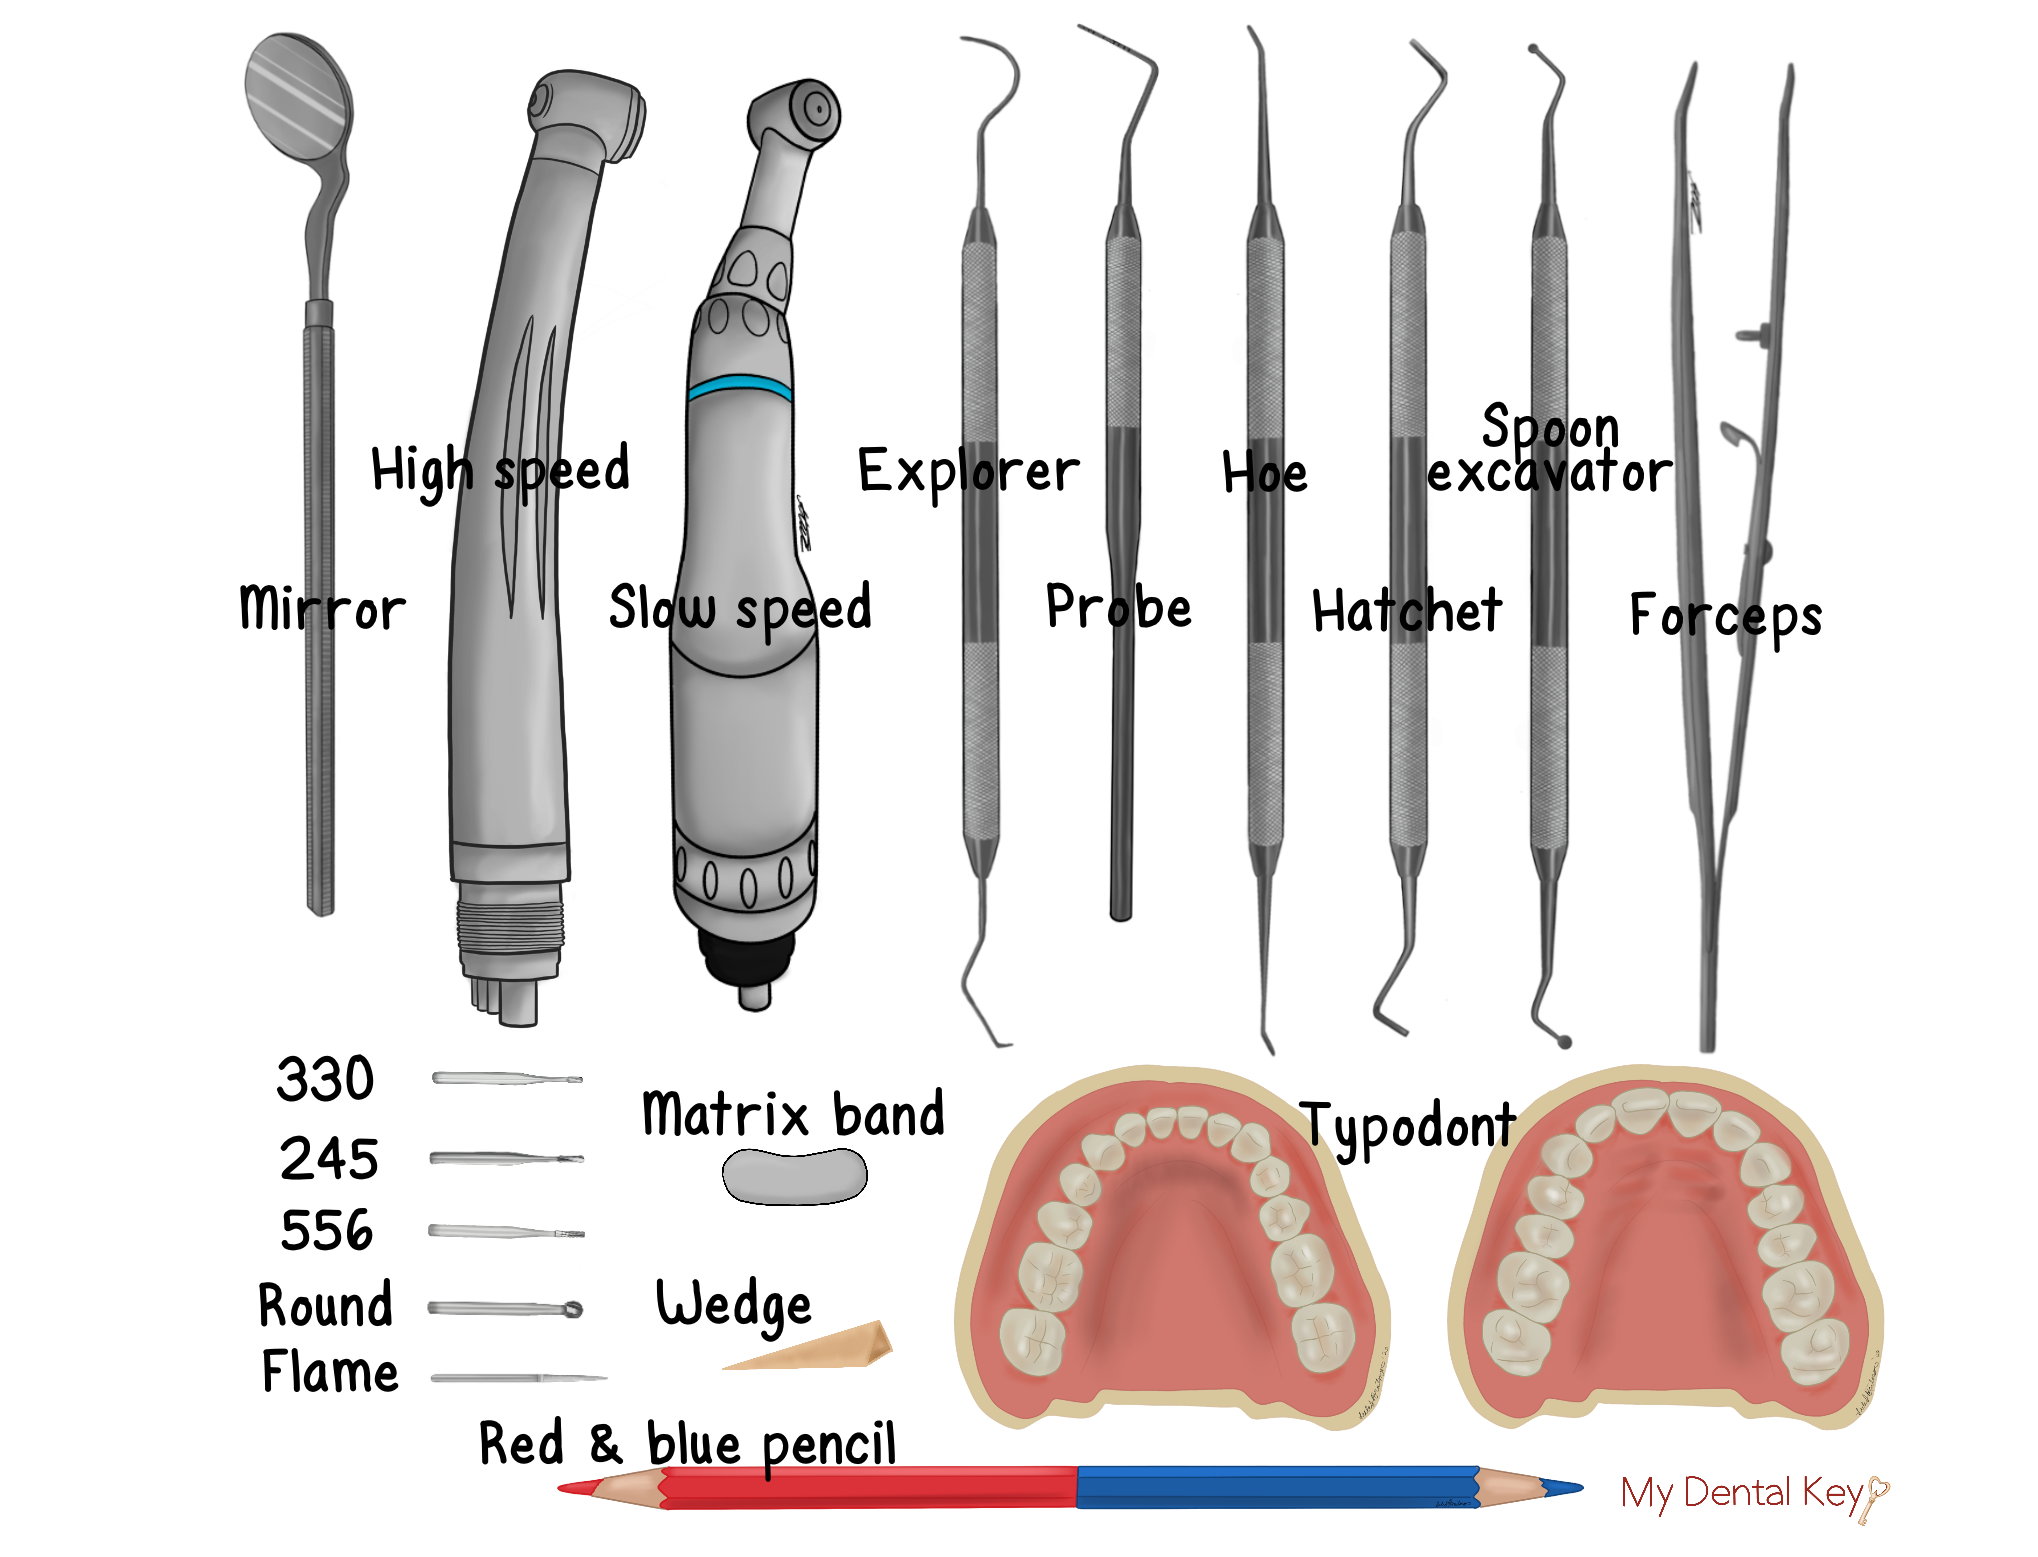
Armamentarium
Instruments and Materials
Video Demonstration
Procedures
- Clinical note: Perform shade selection with natural light prior to isolation of the tooth

- Clinical notes:
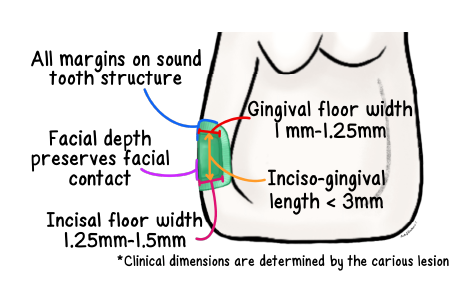
- Preparation measurements are determined by the extent of the carious lesion or existing, faulty restoration
- Class III procedure is performed when caries extends past enamel into dentin. Therefore, the mesial-distal width of the preparation will be at least 0.2 mm into dentin
*Radiographic caries superimposed on preparation


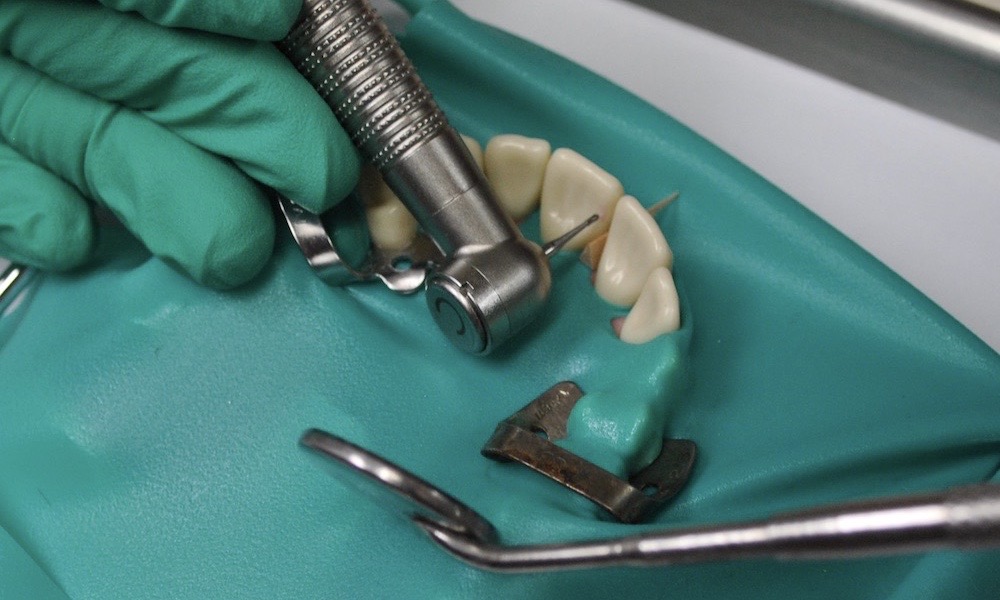
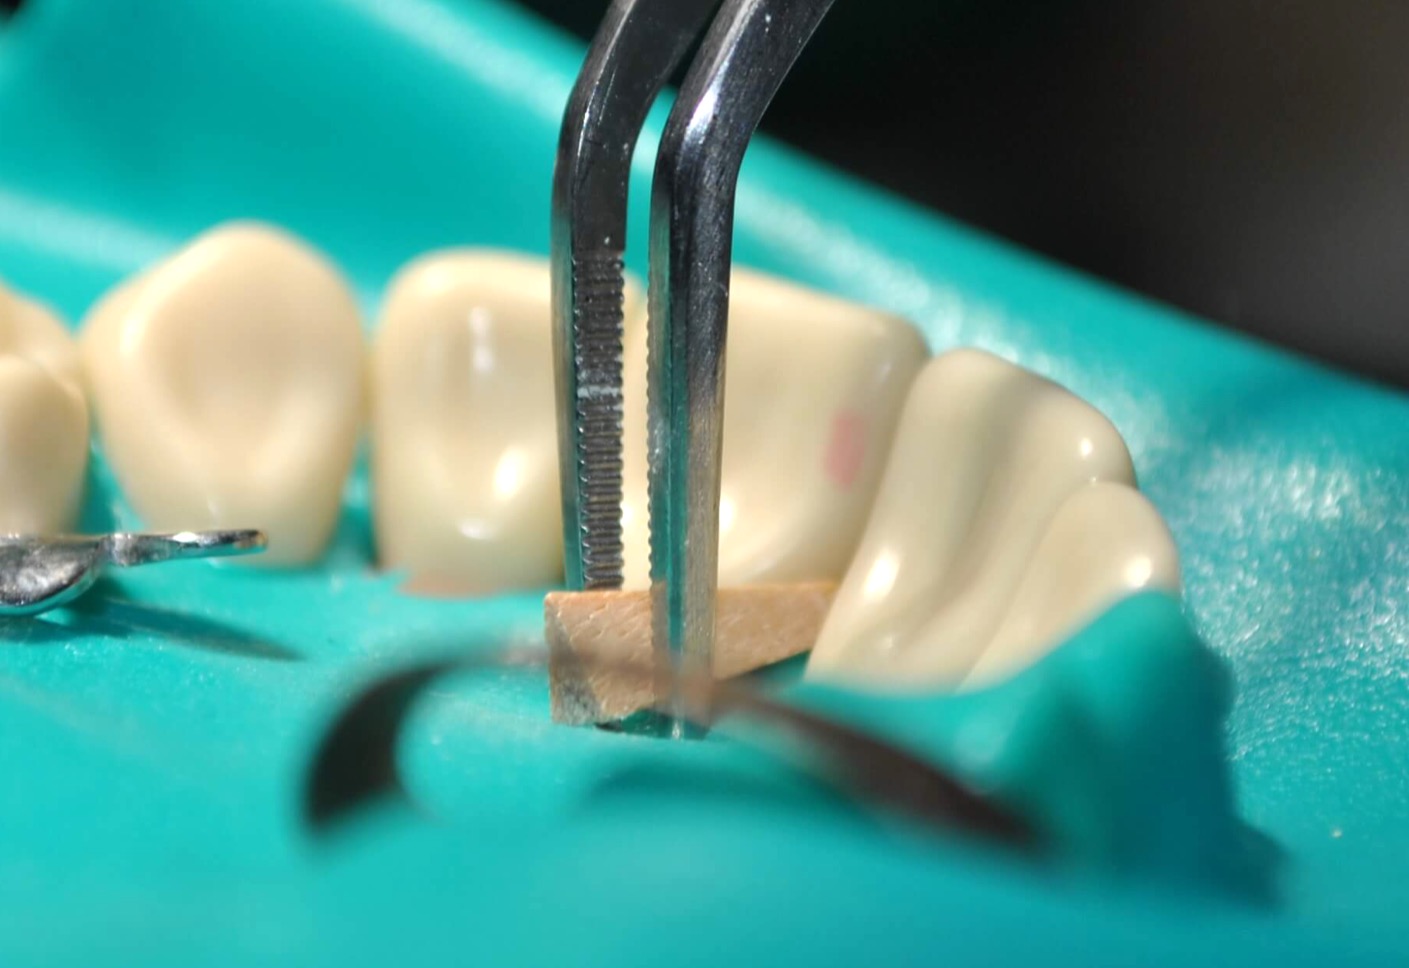
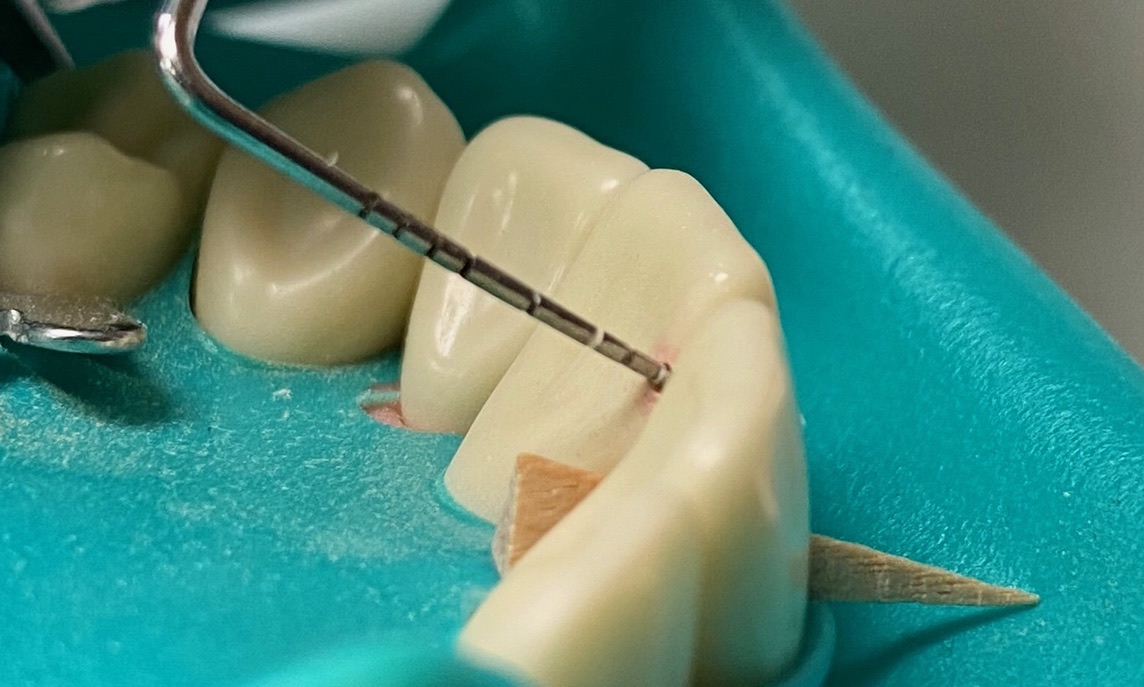
- Optional: Place a matrix band or metallic fender wedge interproximally to protect the adjacent tooth from iatrogenic damage
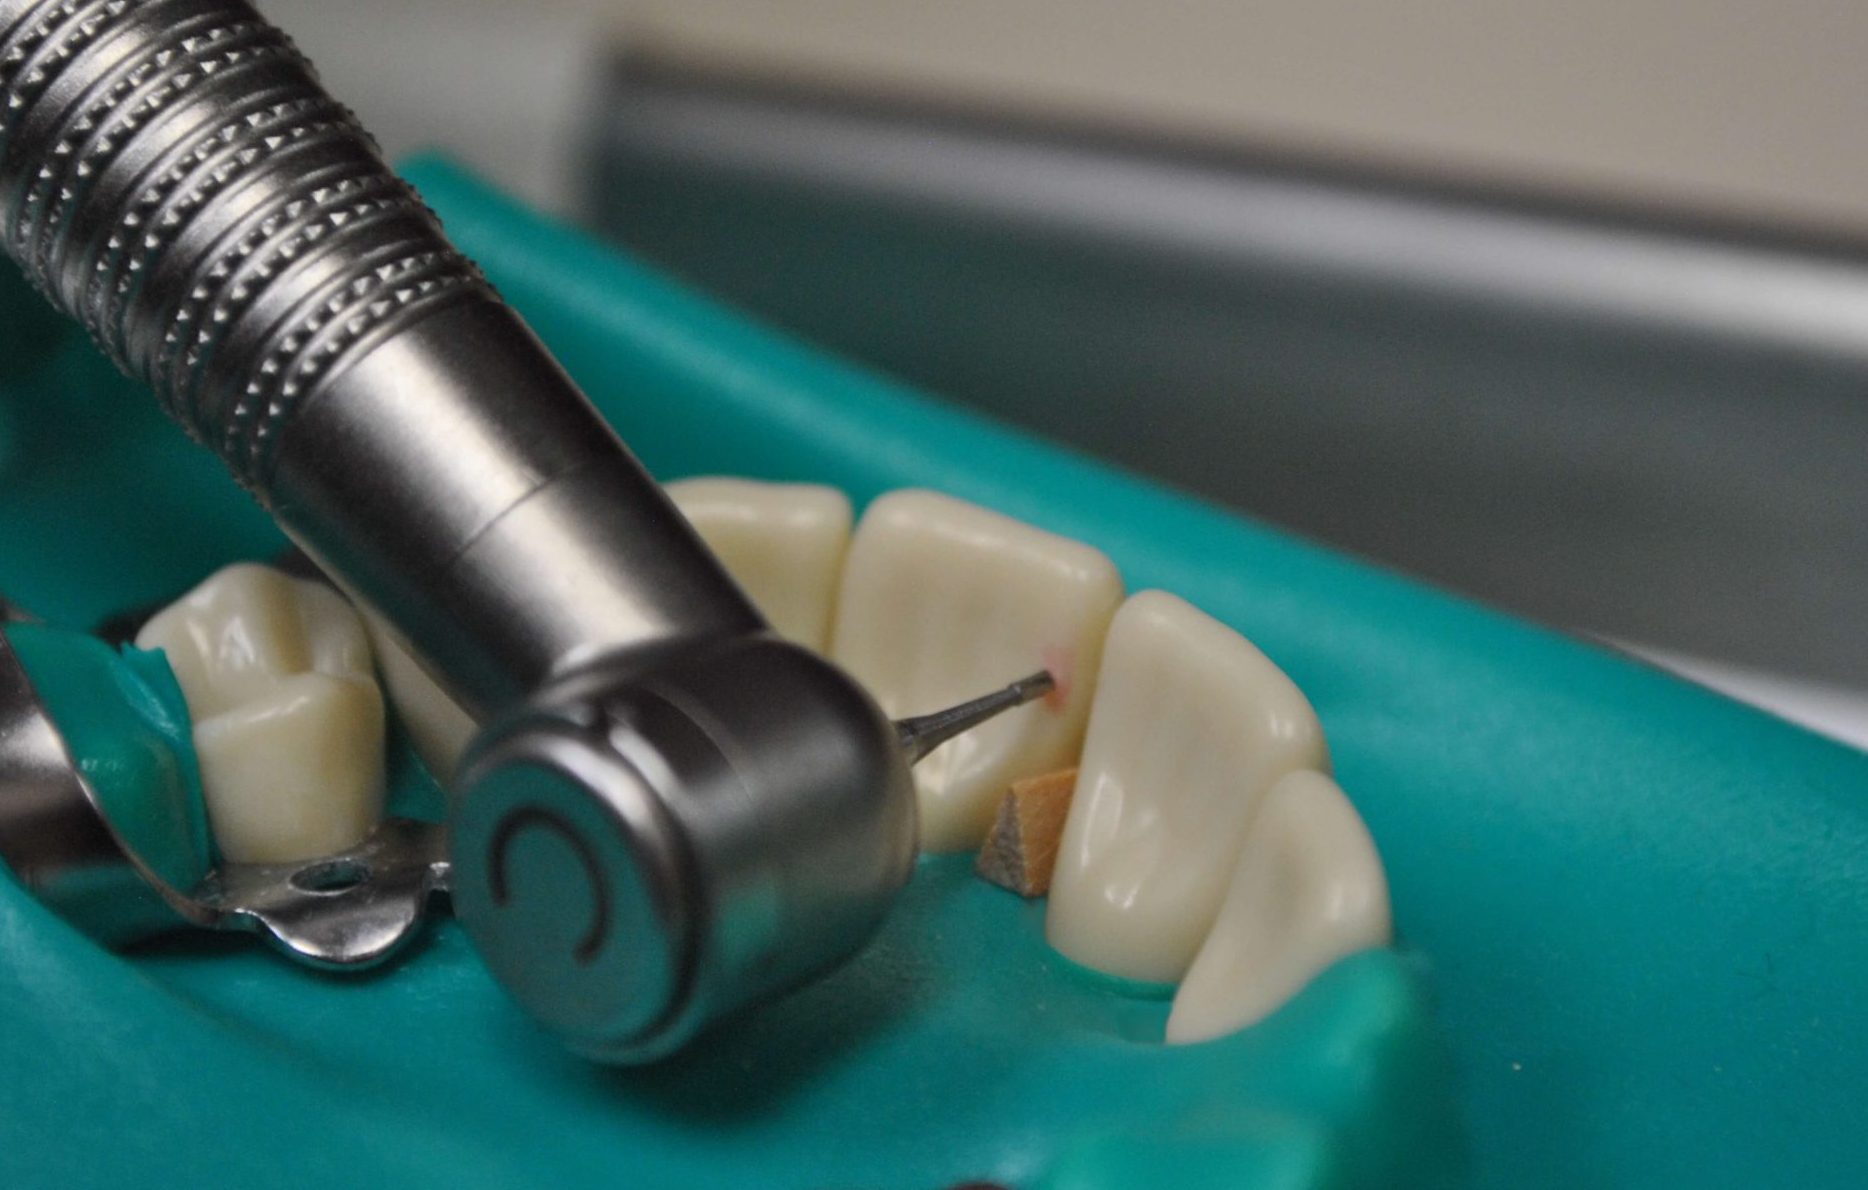
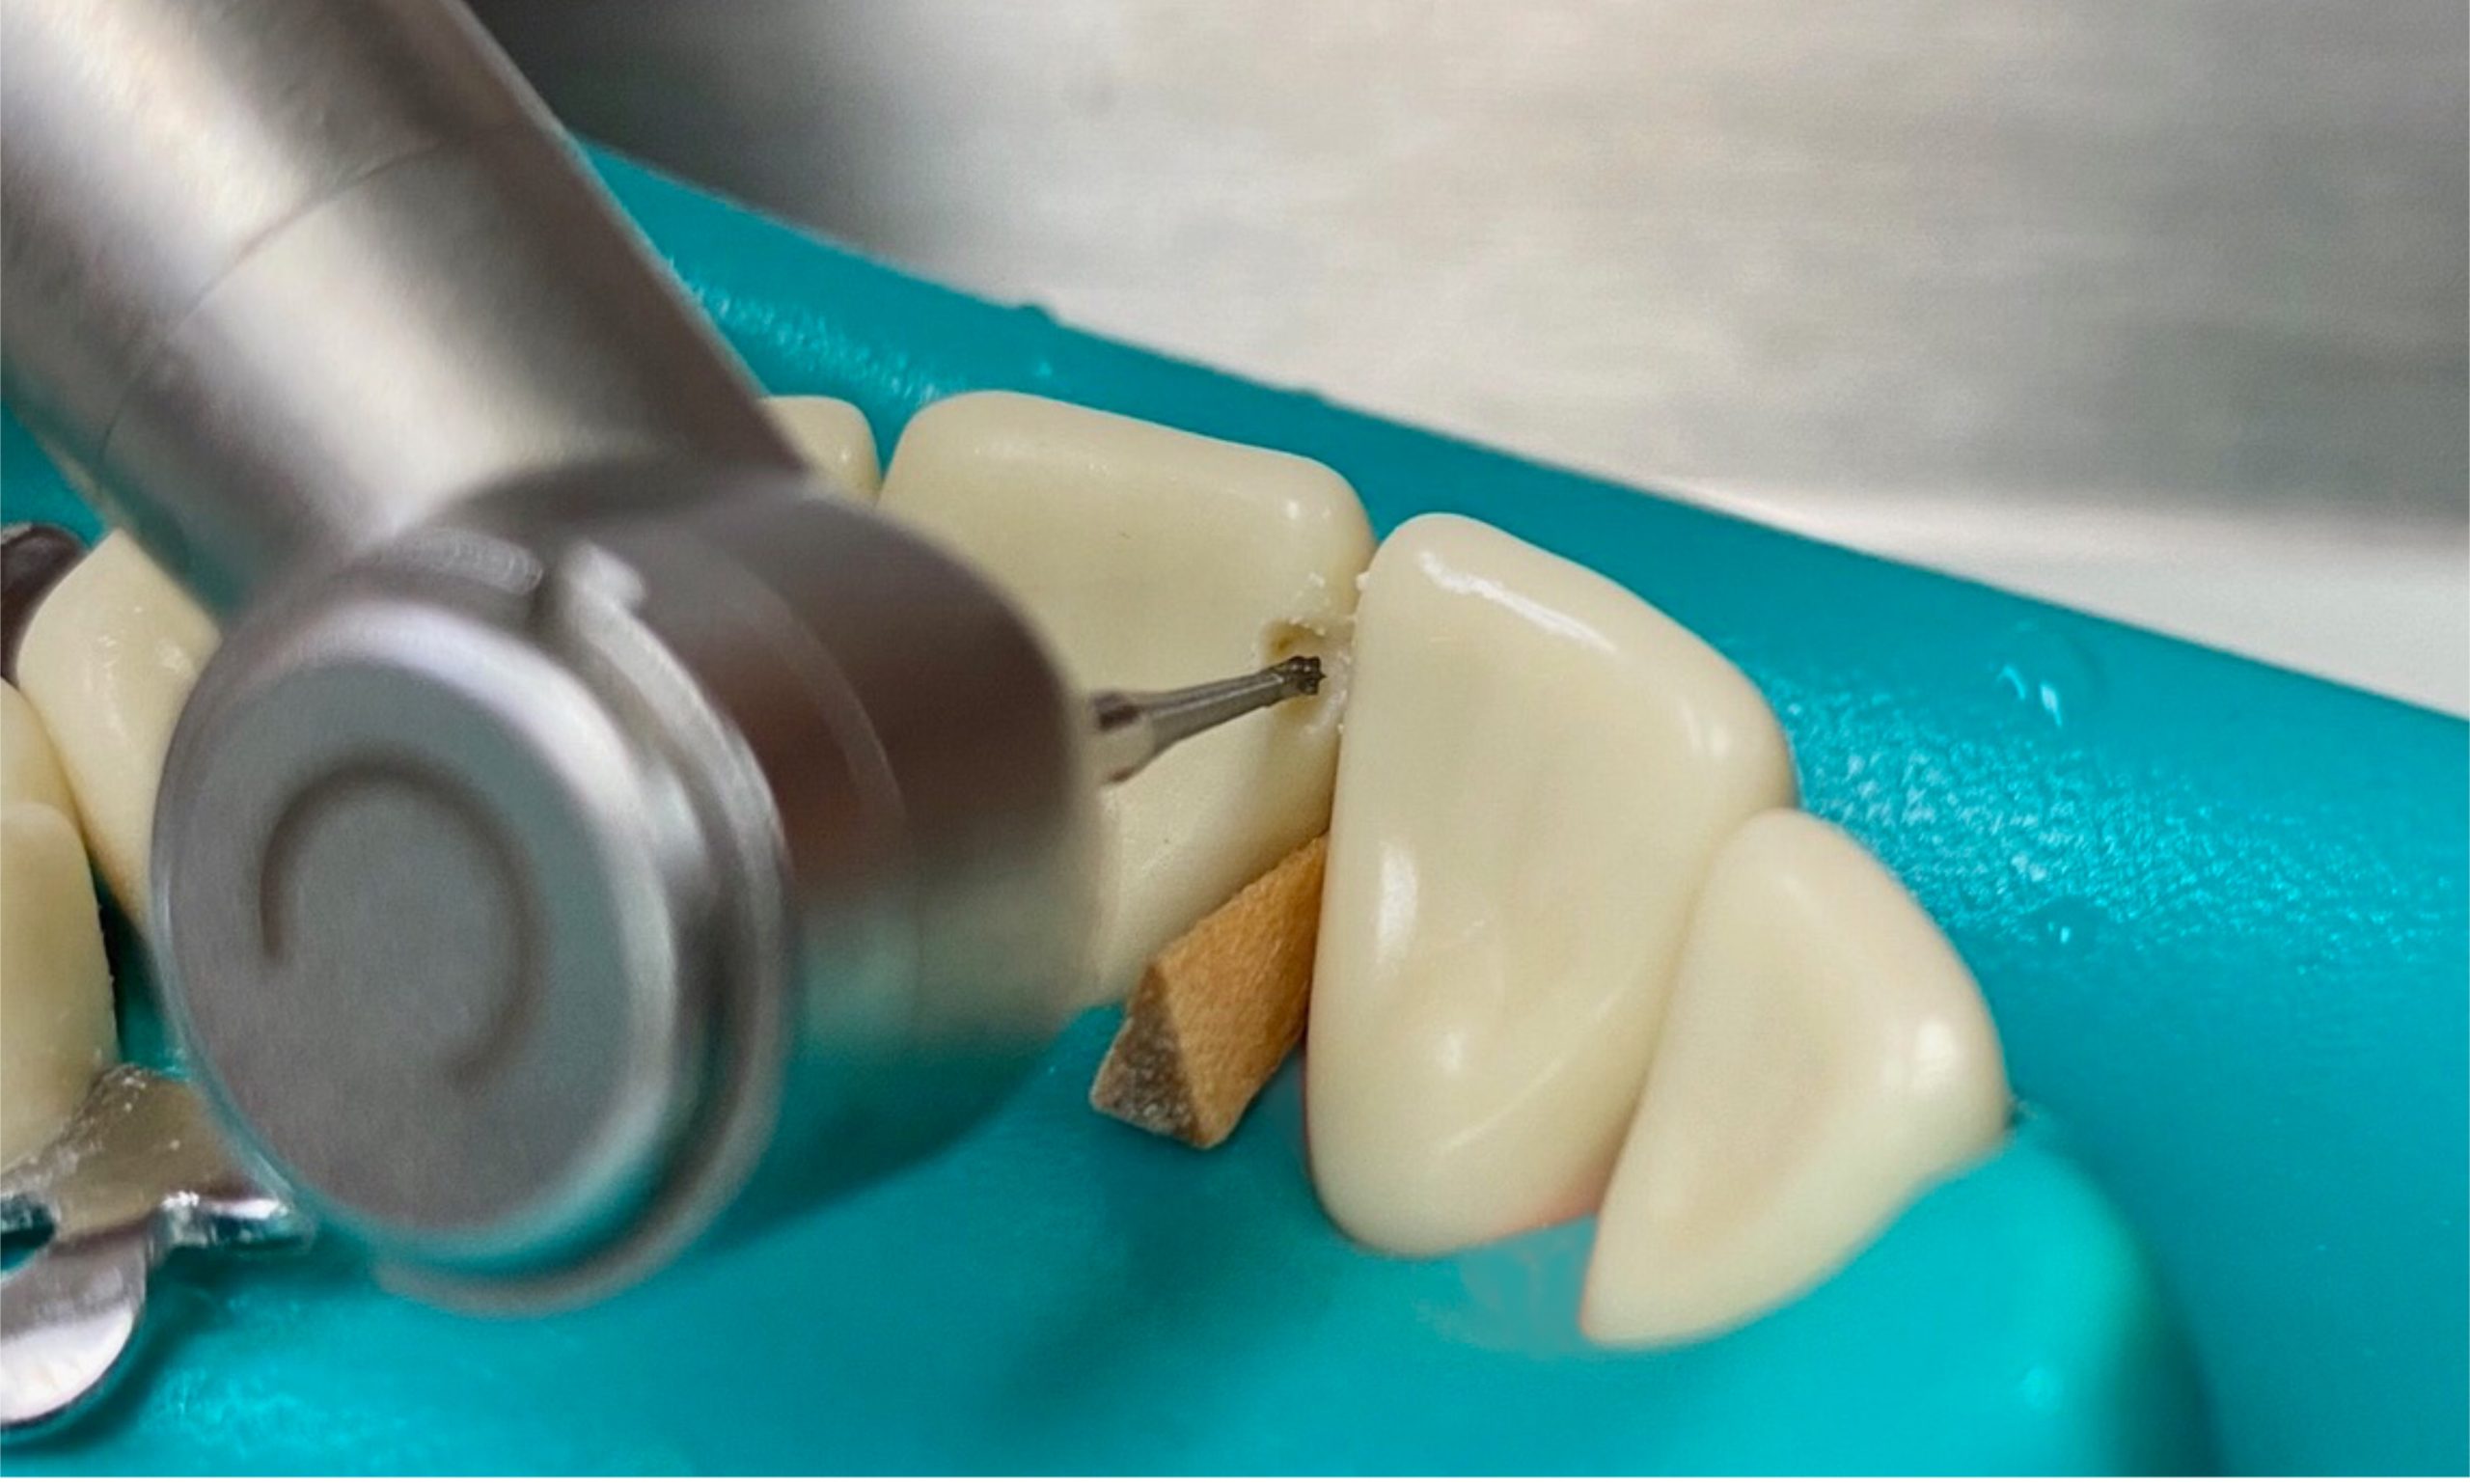
- Clinical note: Position the bur over the carious lesion or existing, faulty restoration
Bur options: pear shaped carbide bur (330)
- Facial wall is at least 90º relative to the axial wall
- Optional:
- Leave a small “enamel shell” interproximally
- Break the enamel shell with a hand instrument
- Clinical note:
- Extension should remove the carious lesion or existing, faulty restoration
Hand instrument options: enamel hatchet, enamel hoe
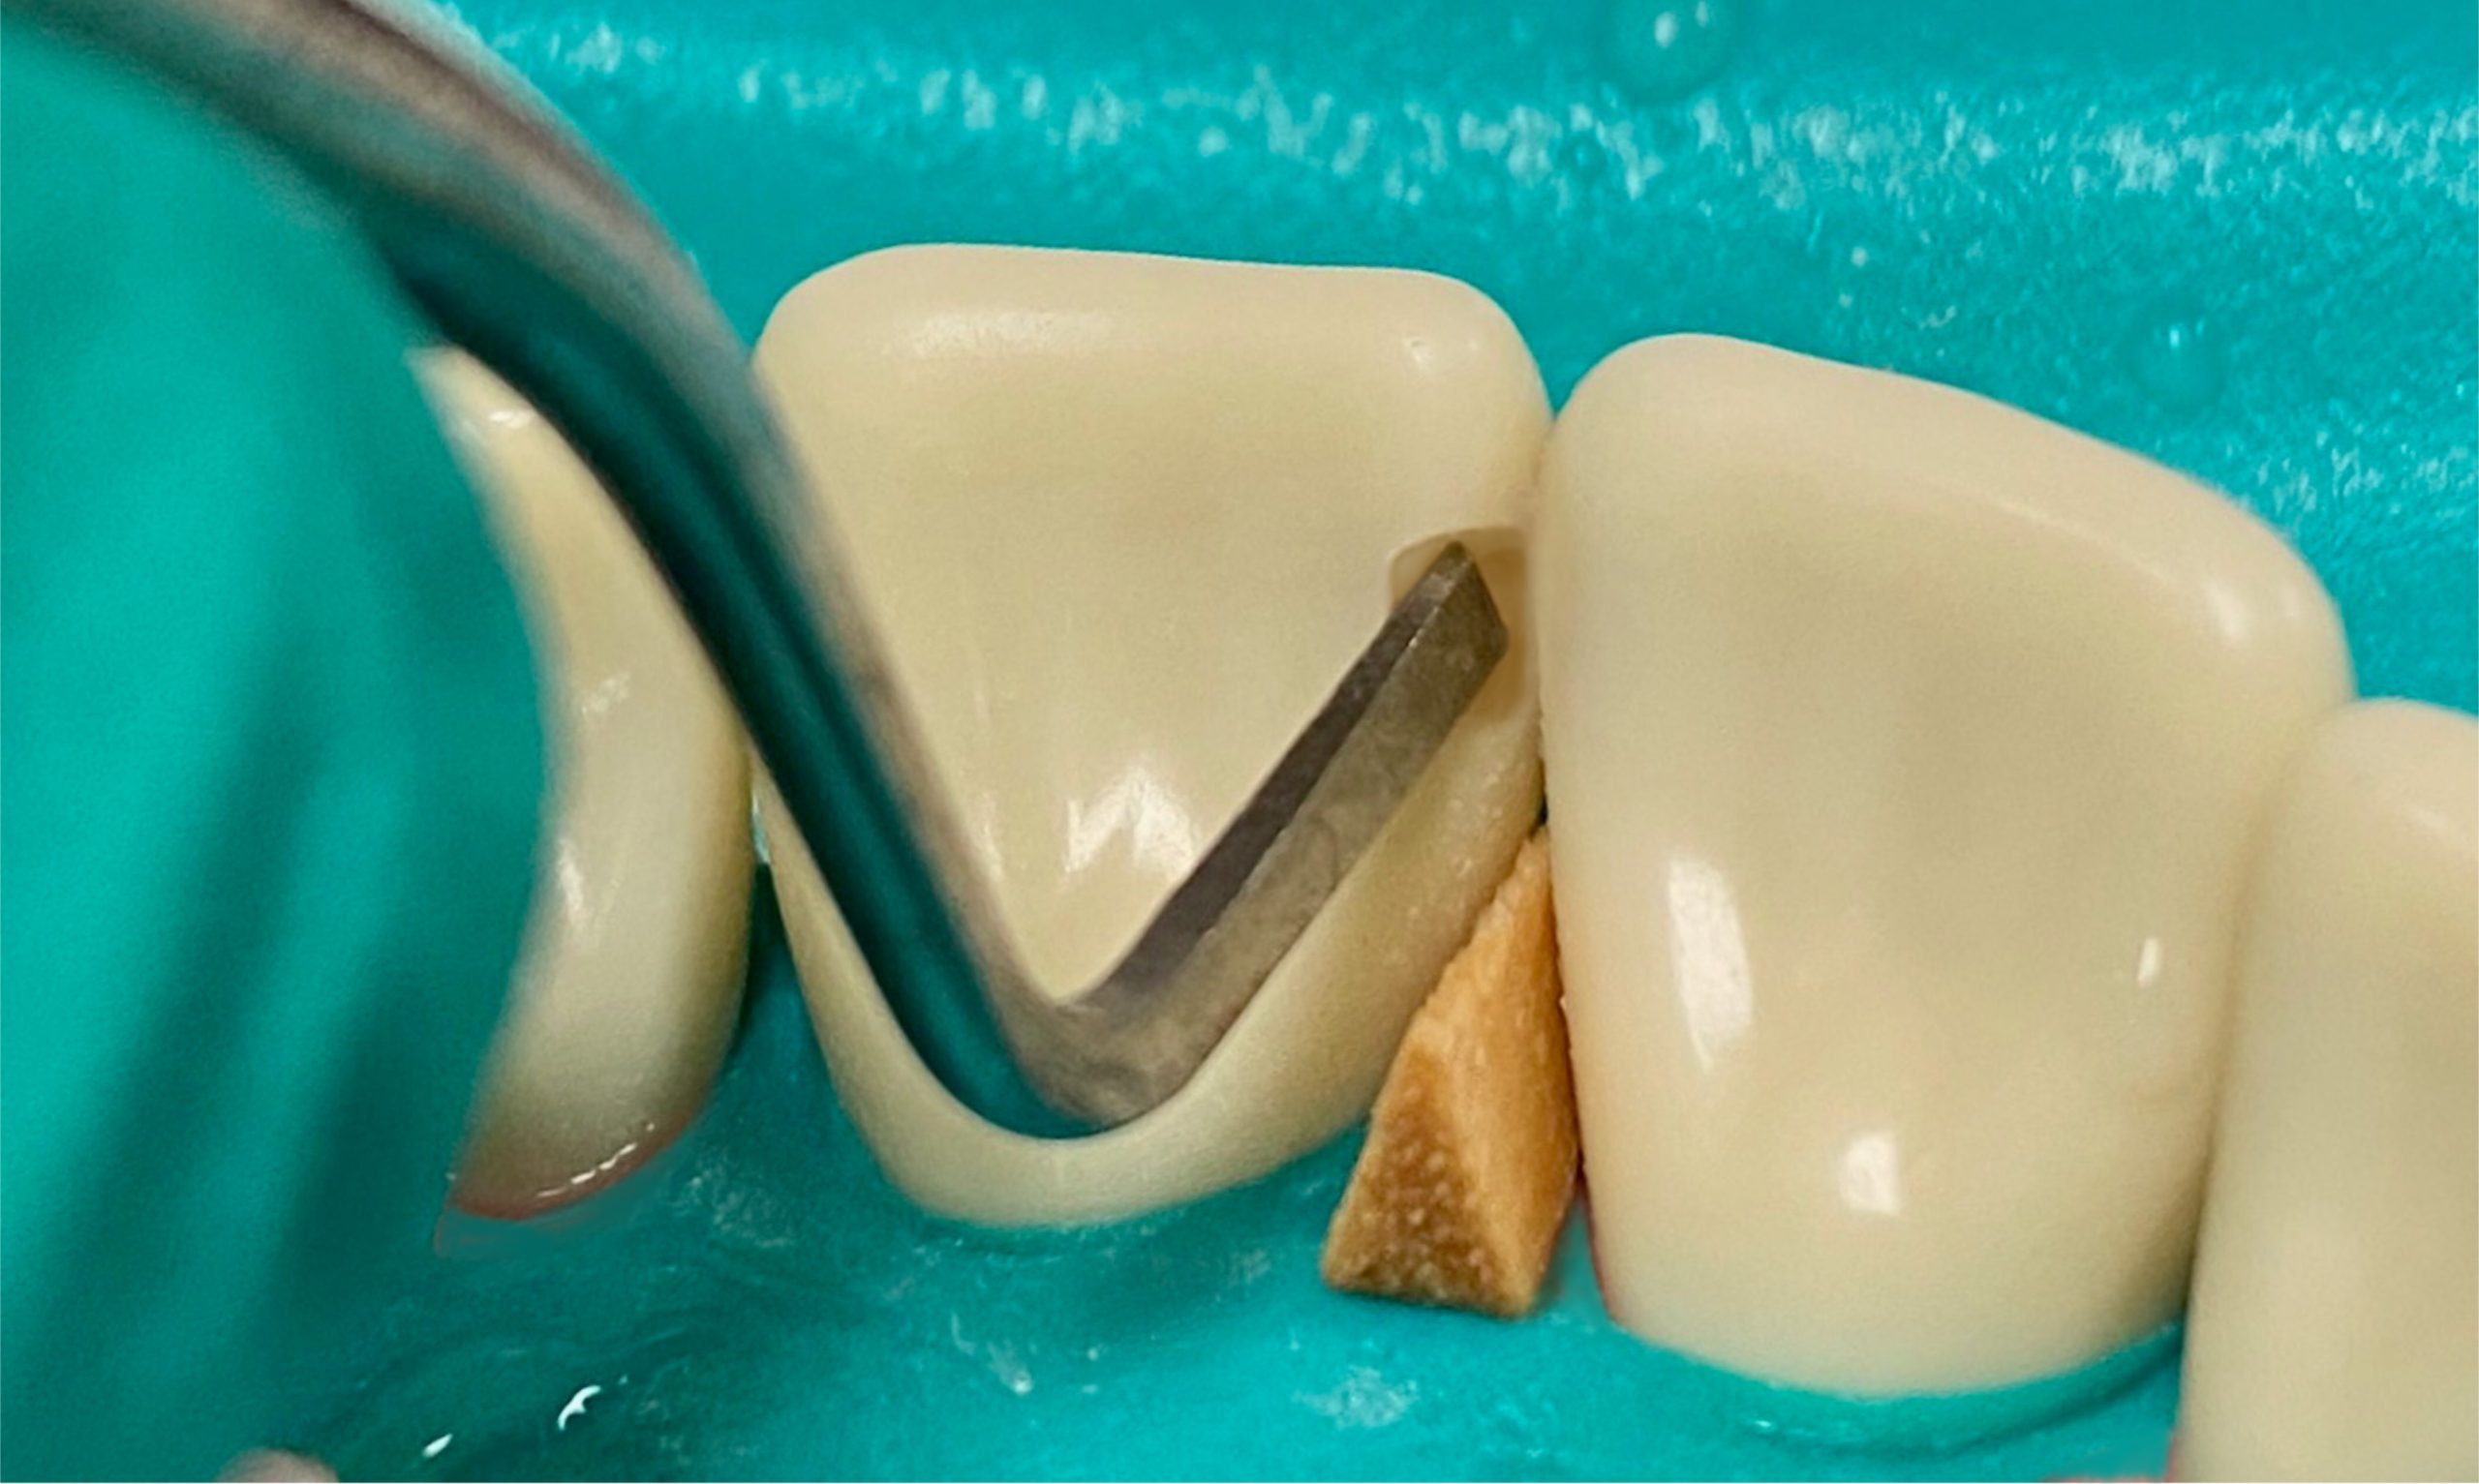
- Inciso-gingival length: 2-2.5mm, no greater than 3mm, depending on the length of the contact
- Gingival floor width: 1-1.25mm
- Incisal floor width: 1.25-1.5mm
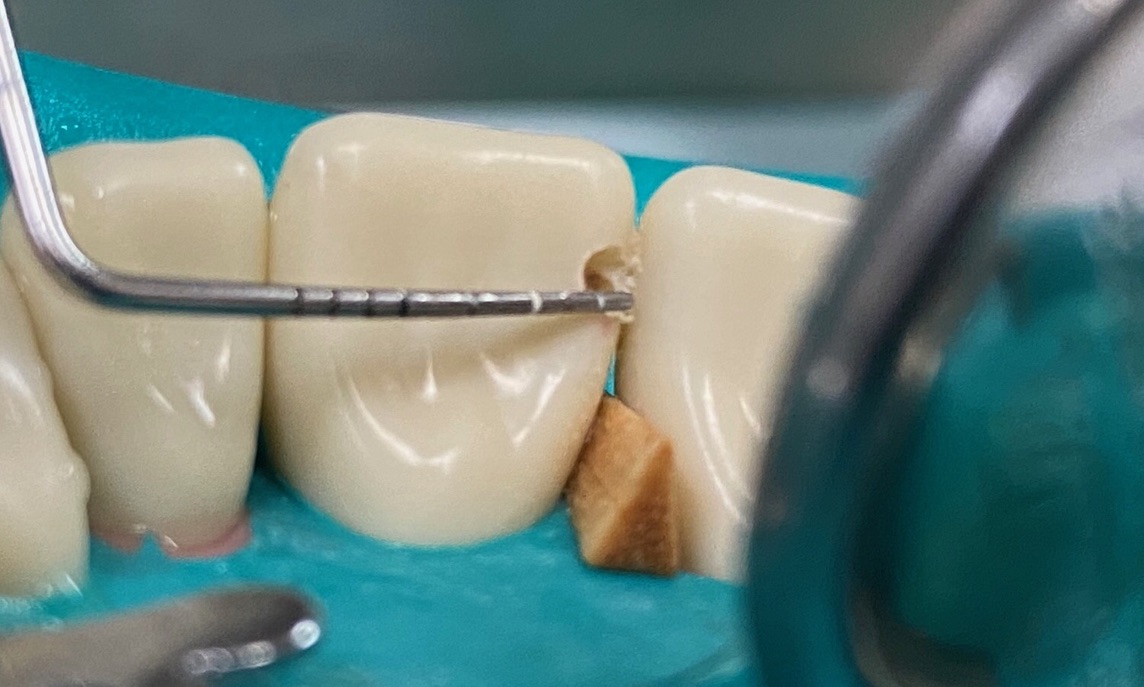
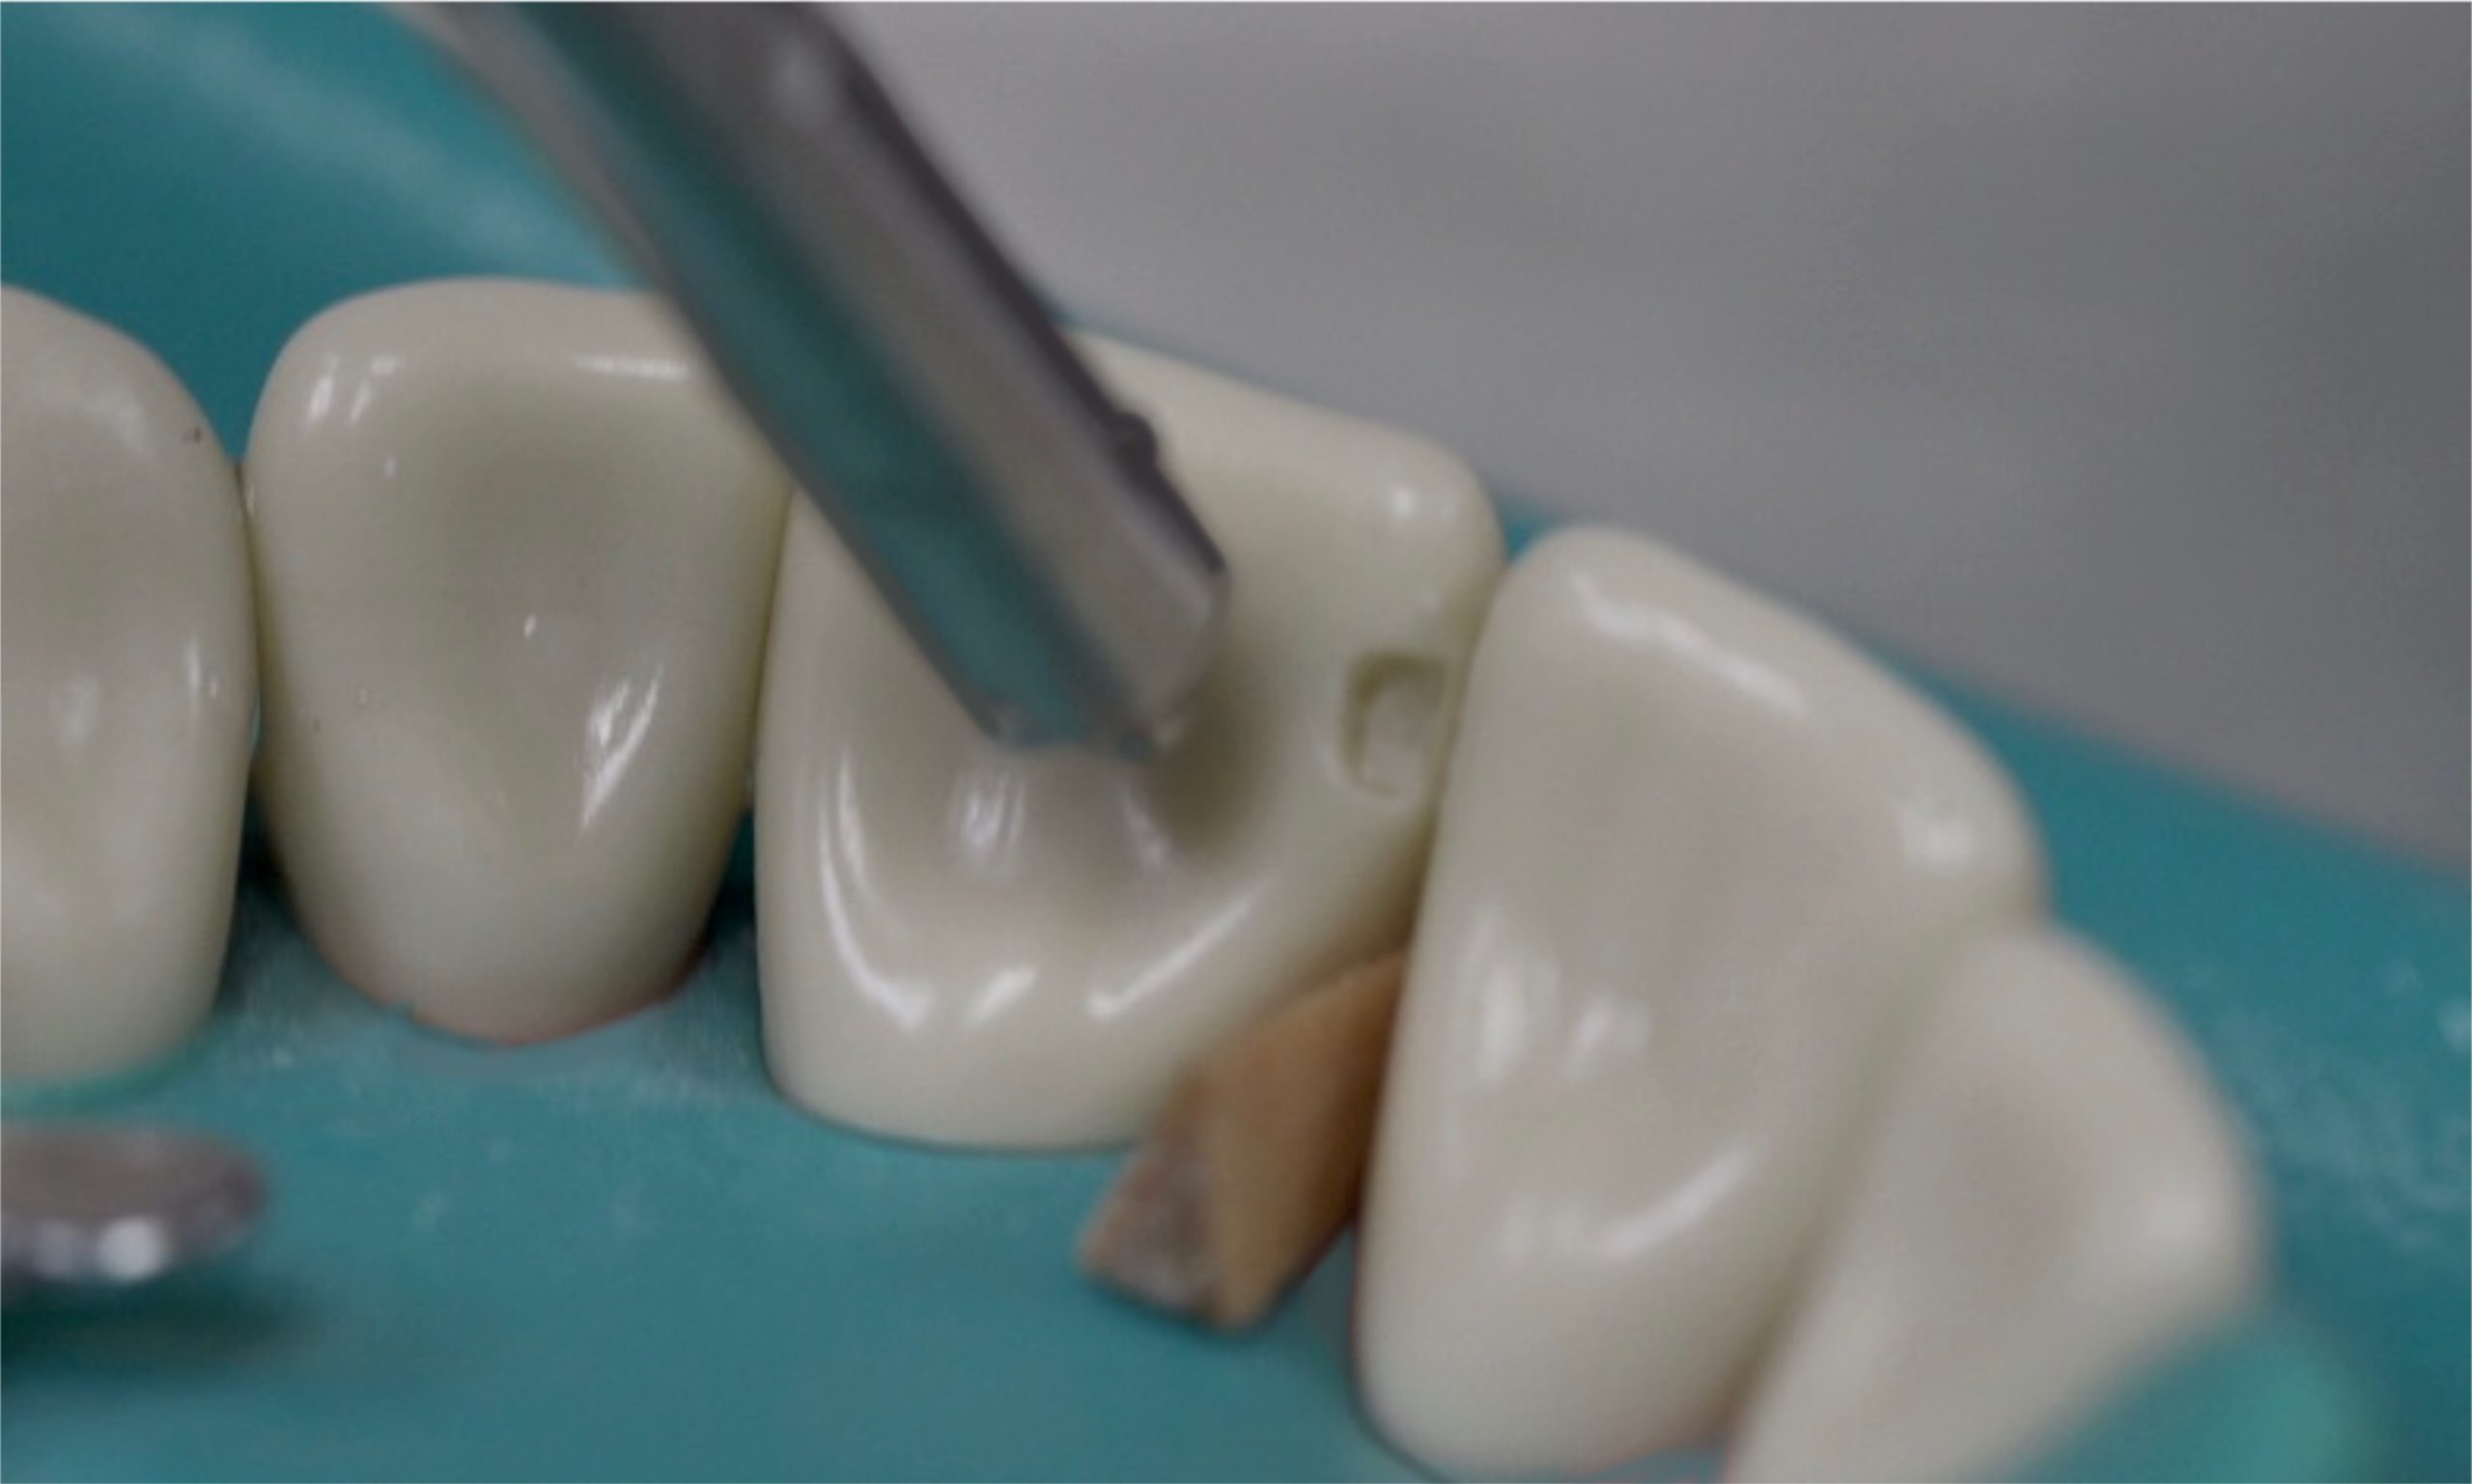
- Assess for remaining caries using the explorer or spoon excavator
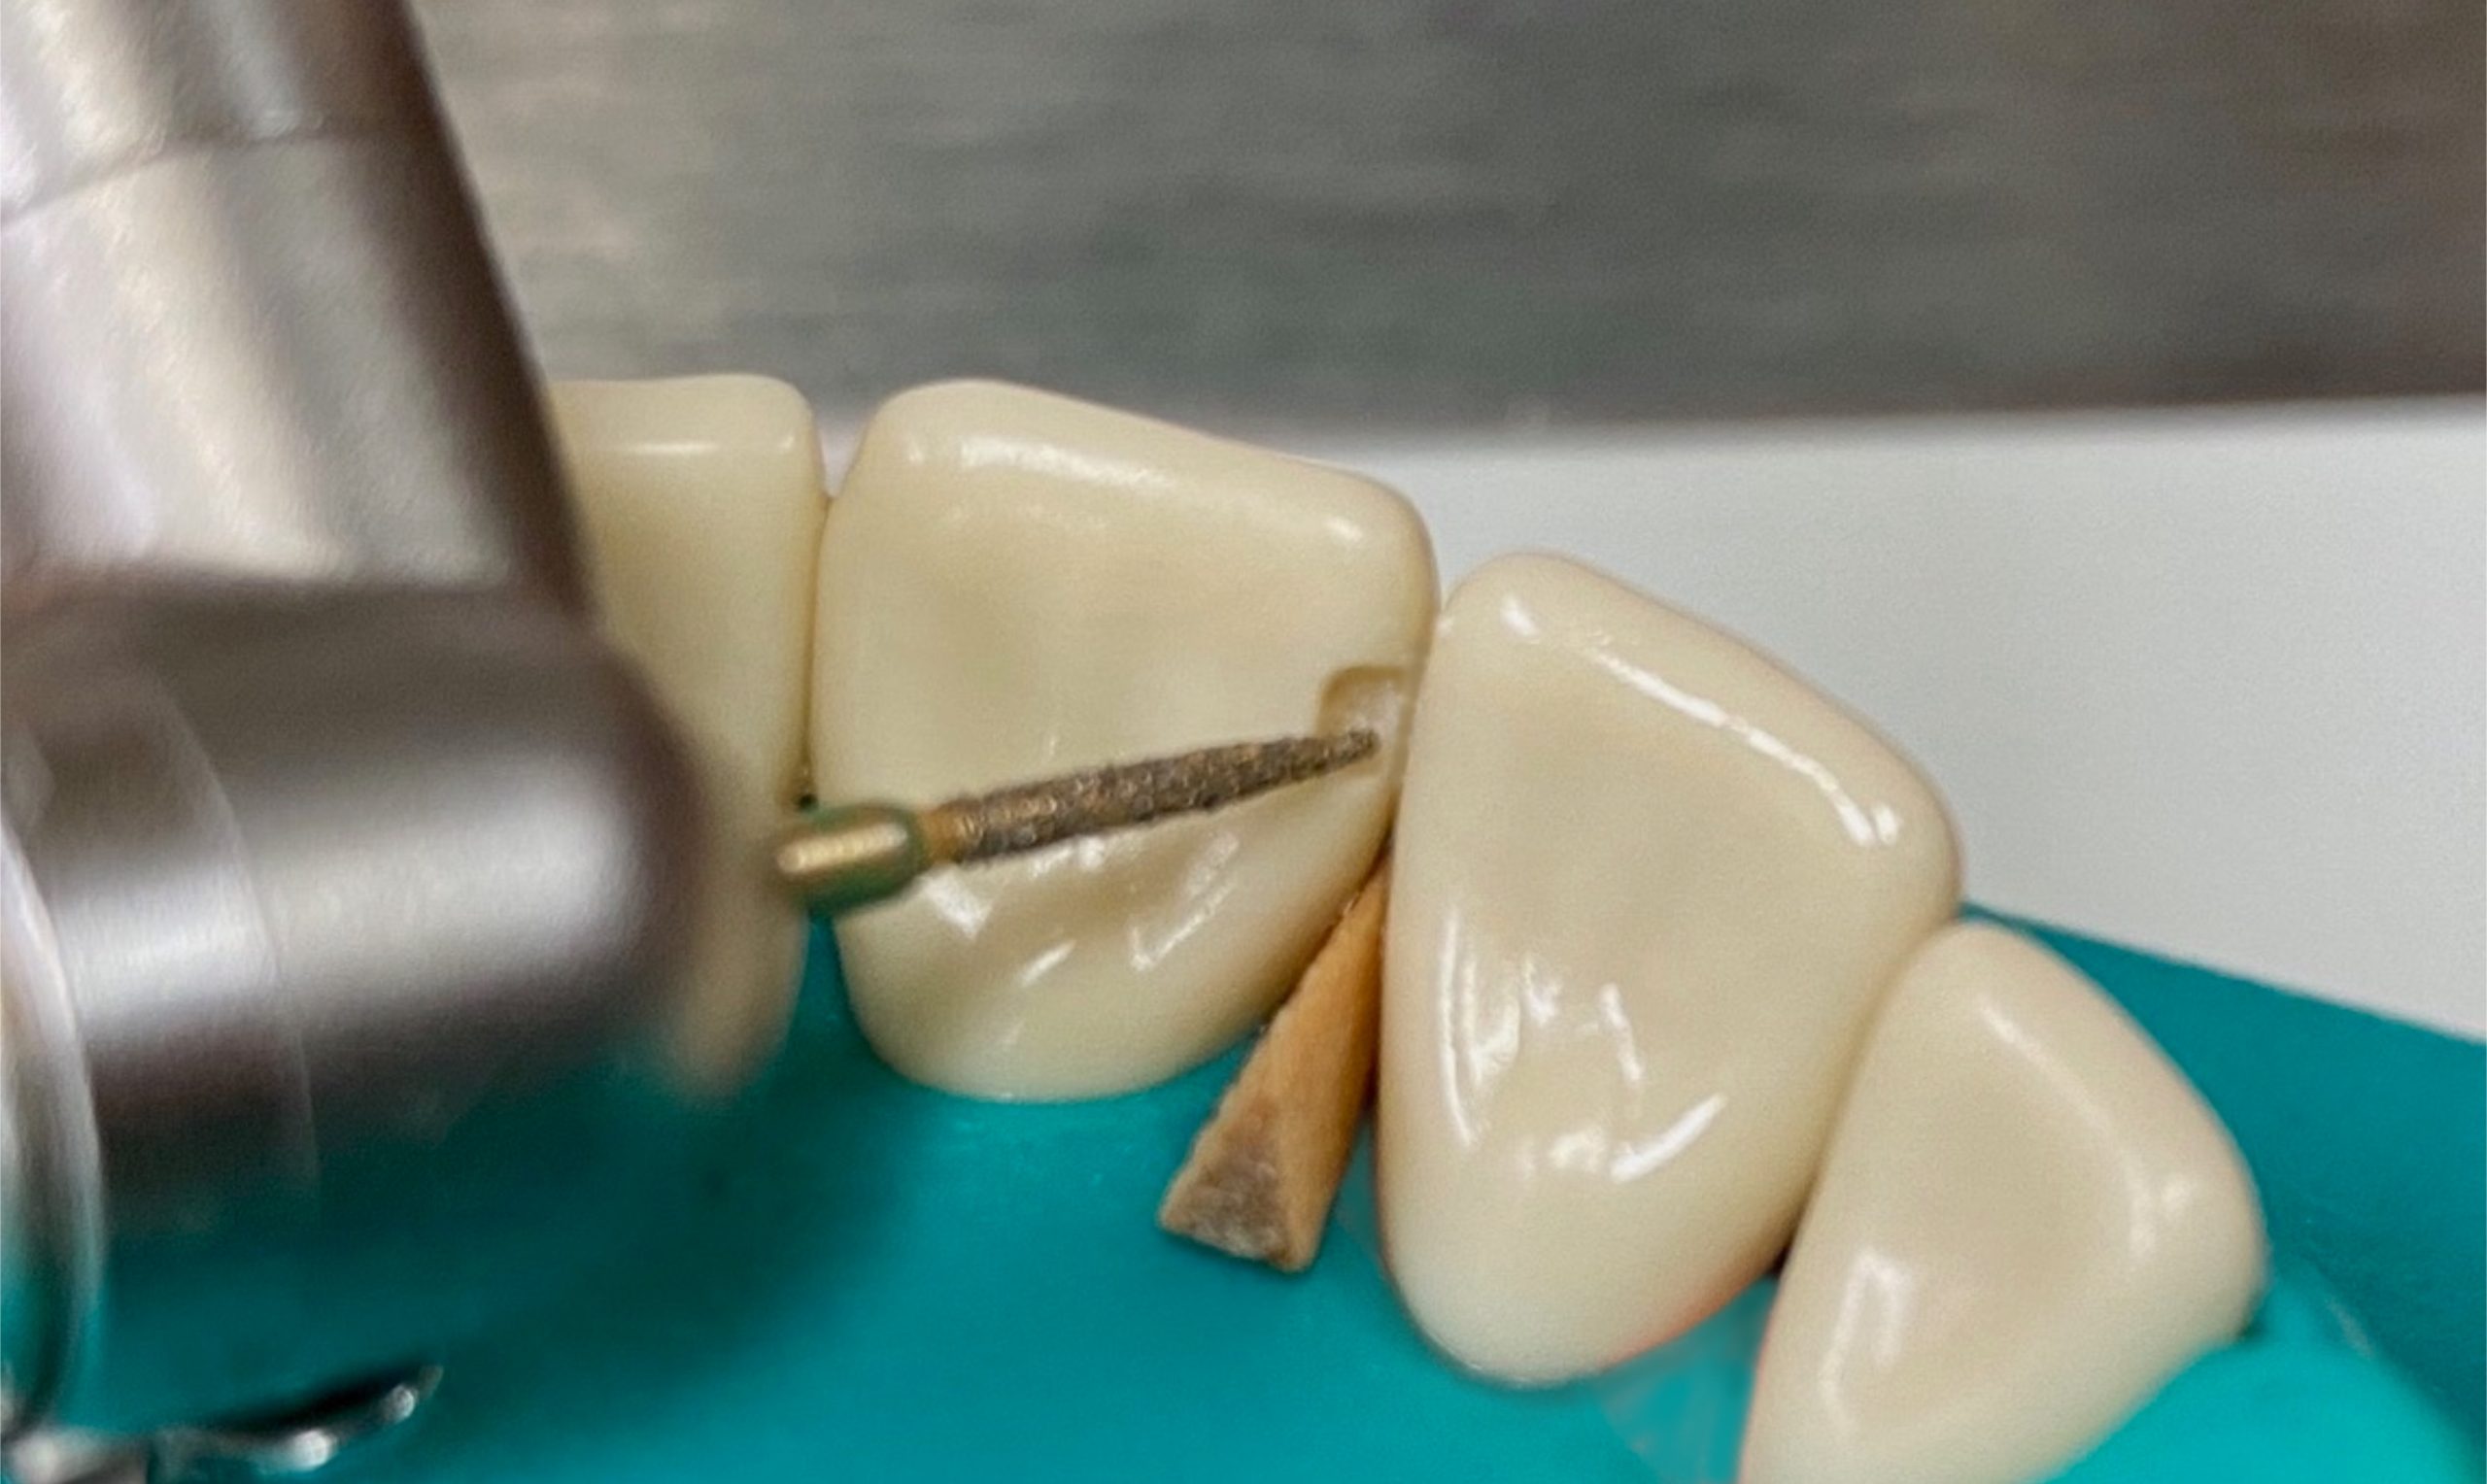
- Remove remaining carious tooth structure using the largest round bur that fits into the preparation with rotary instruments (slow speed) or a spoon excavator
Bur options: round carbide burs (4, 6)
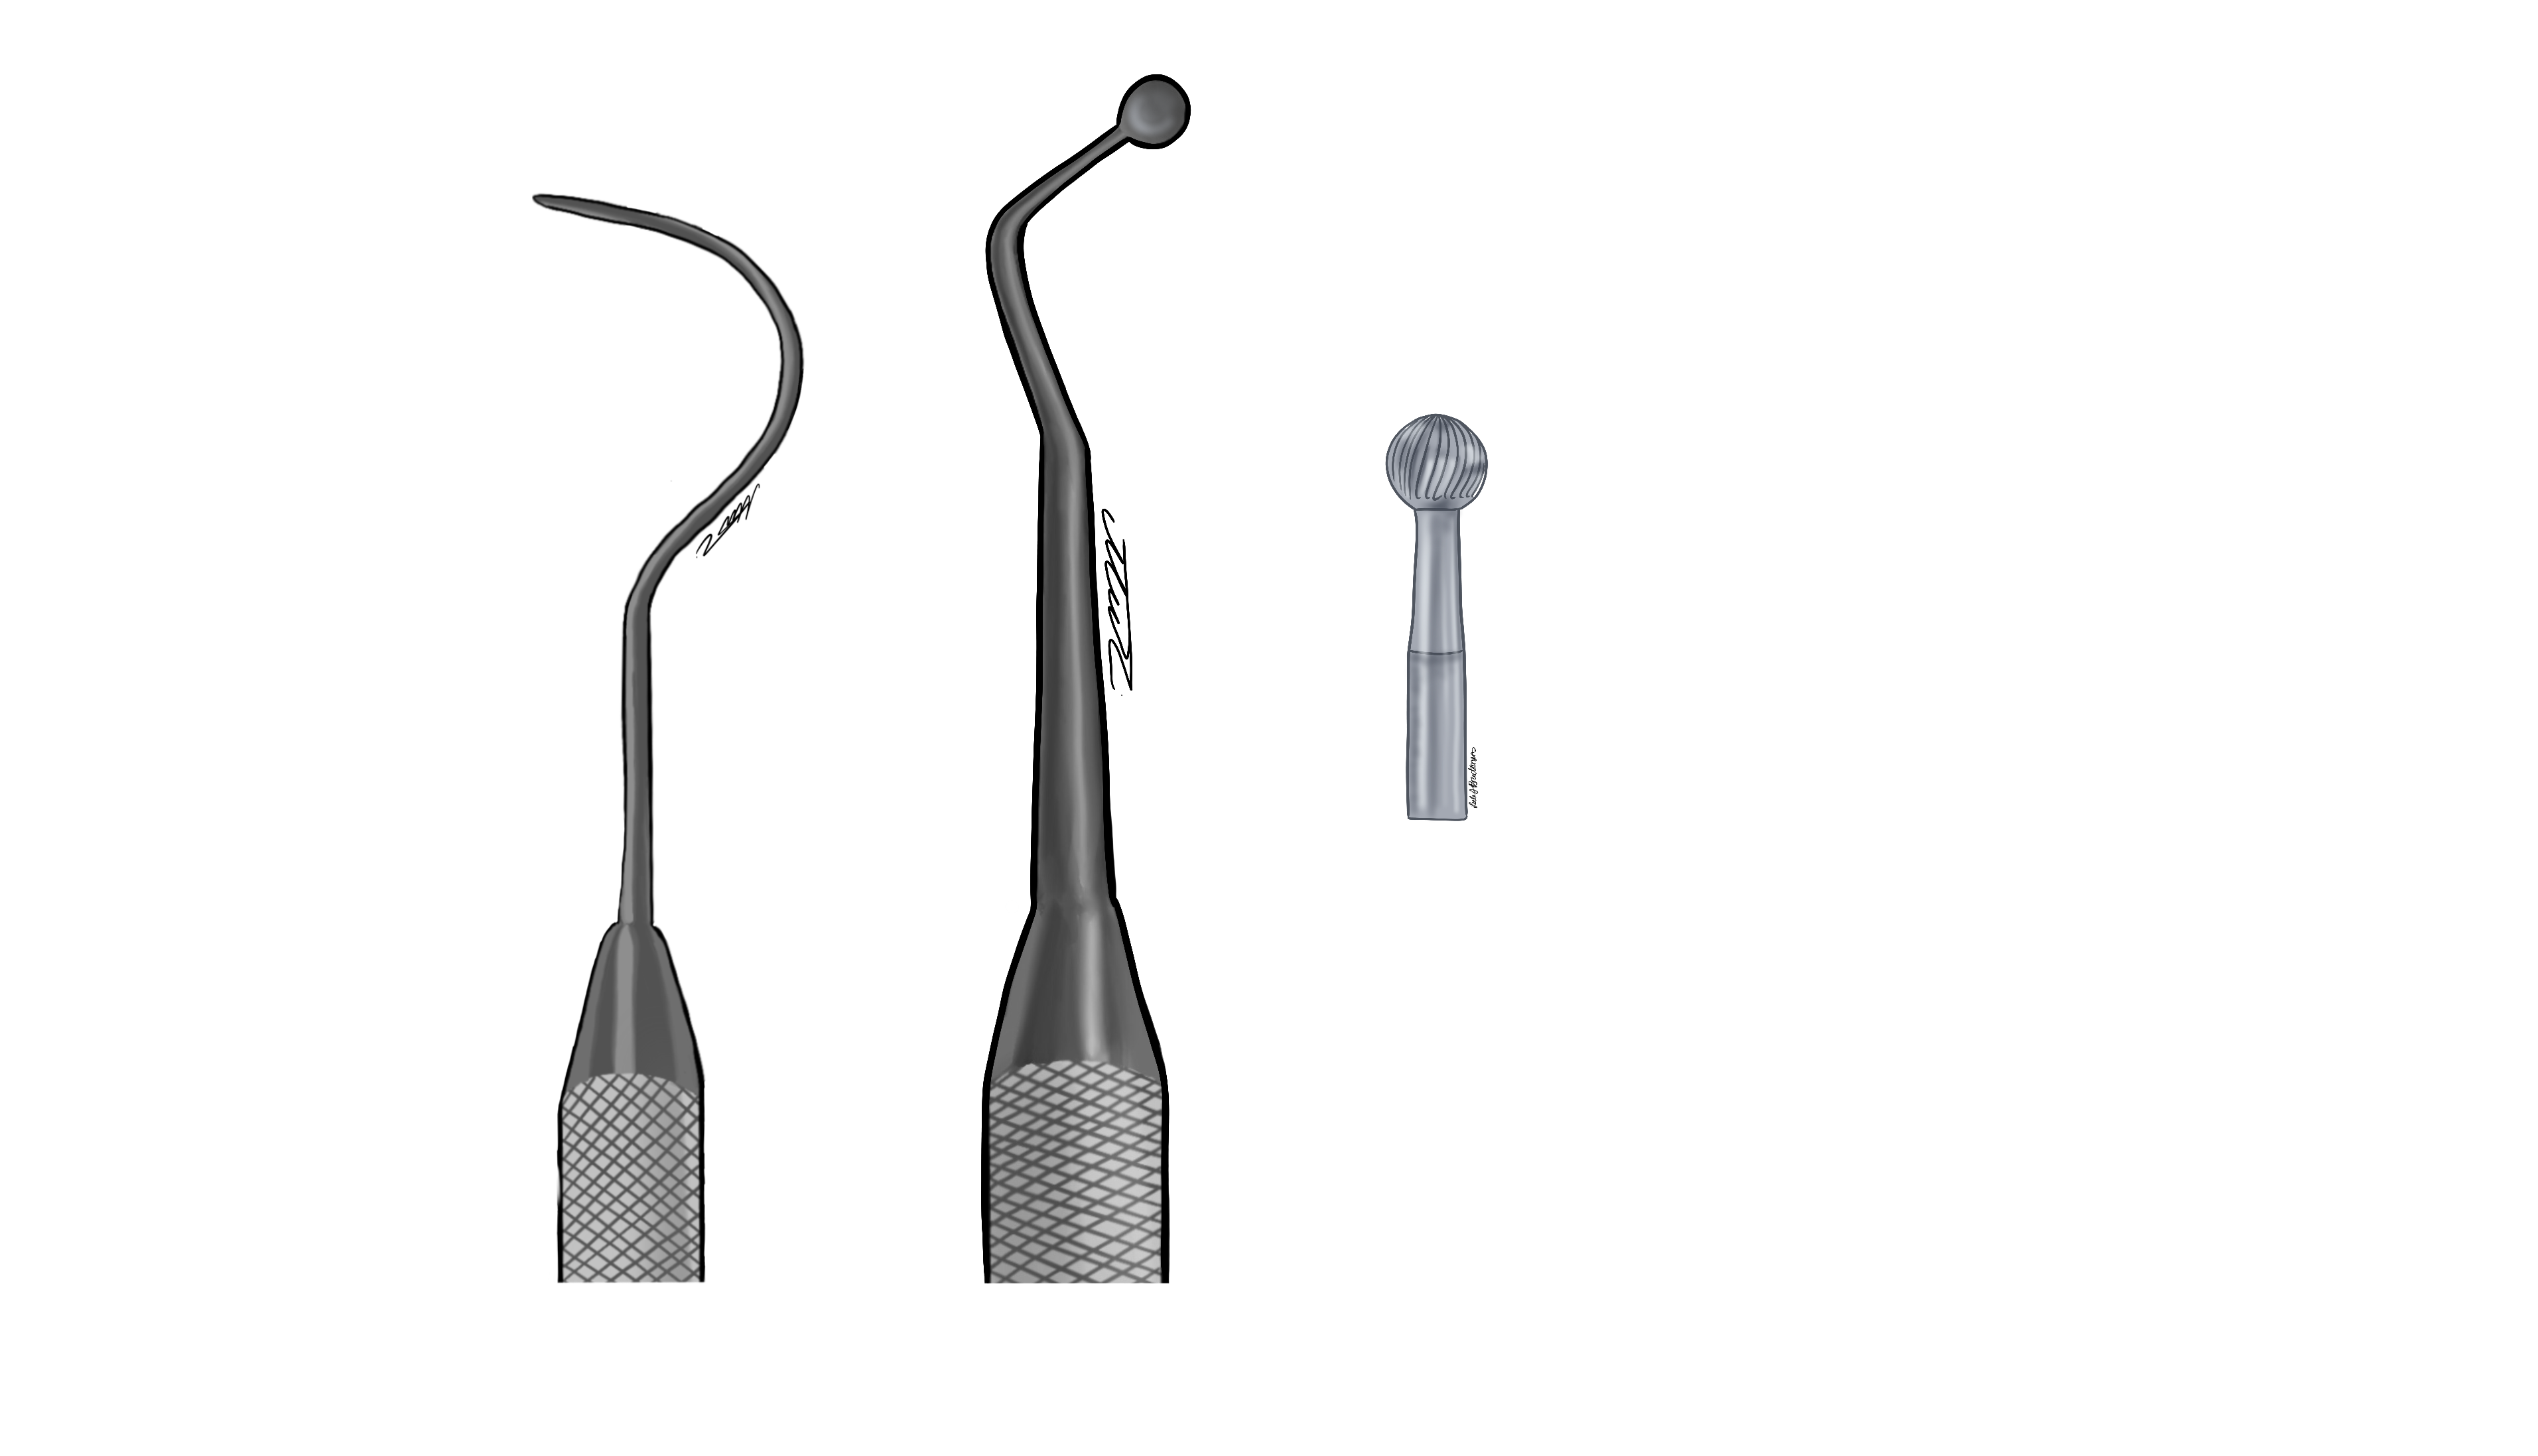
Bur options: pear shaped carbide bur (330)
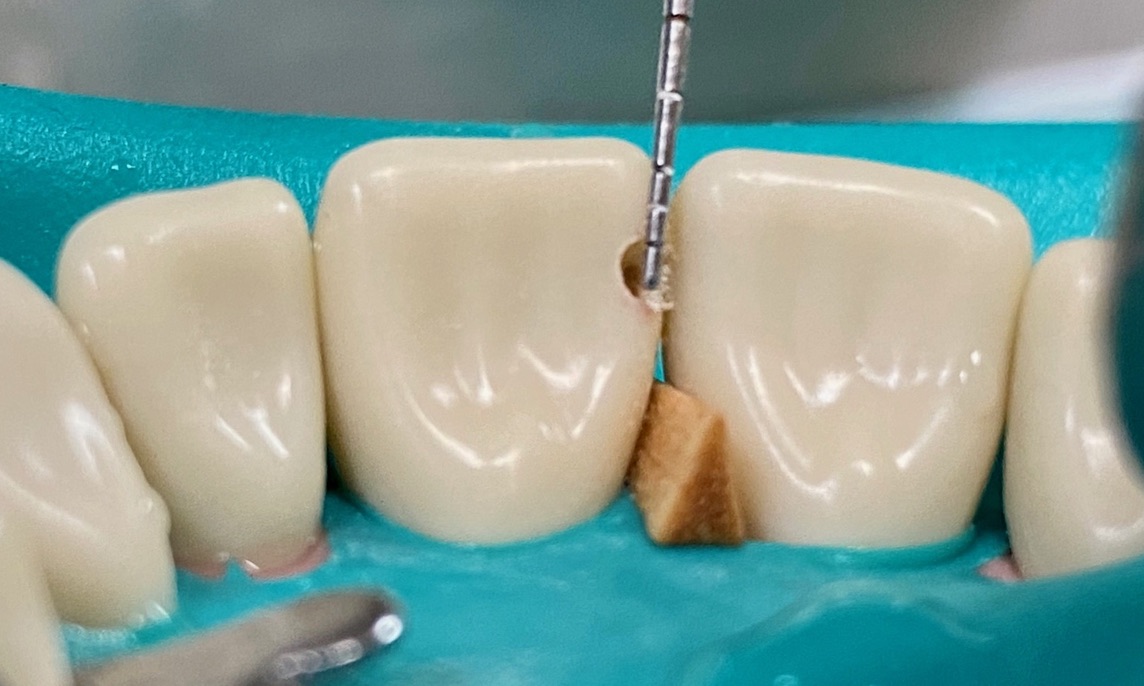
- Remove major unsupported enamel
- Remove steps/ledges
Bur options: straight fissure or pear shaped carbide (556, 330)
Hand instrument options: enamel hatchet, enamel hoe
- Do not bevel in areas subject to masticatory forces (e.g. incisal contact)
Bur options: coarse diamond bur (flame)
- Use the explorer to check for smoothness
- Use the probe to check for appropriate depth and width
- Clinical note: The final depth of the preparation is determined by the extent of the carious lesion or existing, faulty restoration
Checklist
References
Hilton, T. J., Ferracane, J. L., & Broome, J. C. (2013). Summitt’s fundamentals of operative dentistry a contemporary approach. Quintessence Publishing Co. Inc.
Ritter, A. V., Boushell, L. W., Walter, R., & Sturdevant, C. M. (2019). Sturdevant’s art and Science of Operative Dentistry. Elsevier.
Congratulations
You’ve reached the end of this lesson